I love a thin crisp rolled sugar cookie. Here’s my family’s recipes from long ago. The hint of nutmeg makes it extra special.
Read moreFrench Macarons
Are you ready to tackle French Macarons? Here's my recipe and some tips & tricks.
Read moreBonjour!
What a month this has been! There's so much to tell you. First, I'll tell you the really big news. Early this Spring, I presented a book proposal to a publisher who loved it! We've signed the contract so in 2014 I'll have a cookbook. The book will have the recipes I teach here at The Little French Bakery with many others. I'll be doing the photography and adding stories with the recipes. As the writing and editing progresses, I'll keep you posted with details of the book's release. It's incredibly exciting. It will be published by Skyhorse Publishing, New York.
What else? Recently, we were in France, on a barge with friends cruising on the Canal du Midi. Our barge was named Emma. The hosts, crew and views were wonderful. I'll be writing more on the barge life in a future post. I had every intention of blogging on our trip but due to technical difficulties, (a brain cramp on my part) I couldn't get to my blog to write using my Ipad. I debated about bringing my laptop and didn't. Big mistake. I've missed writing, but I have so much to show and tell. Our trip also included a weekend in Bruge, Belgium and several days in Paris before and after the barge trip. We had time to walk the streets and take it all in. There are so many great places I've wanted to tell you about, and now I have photos to help.
Here are just a few of my favorite sights from Paris. My postcard to you.
Cafes. I love the chairs, tables, place settings, and ambiance. The streets were lined with tables filled with Parisians and tourists soaking up the sunshine.
A Fromagerie. Cheese as far as you can see. The smells are incredible (as long as you like cheese!) We had just come off the barge where we enjoyed many great cheeses. It was a treat to look in the case and recognize some of the names of cheeses that were new to us. A new favorite, Mimolette. Bright orange, sharp and crumbly. It looks like of like a cantaloupe. It's in some cheese shops. I highly suggest picking up a small piece. to try. I can't write about cheese without mentioning Morbier. A beautiful semi-soft cheese with an ash layer separating and layers of cheese.
And of course, the Tour Eiffel. When we checked into the hotel for part deux, the receptionist at the Madeleine Hotel asked if we would like to be on the floor that views the Eiffel Tour. She didn't have to ask twice. The third frame is the view out our window at dusk. When we got back to our room after dinner, I sat on the edge of the bed with my camera for a least an hour watching the color of the sky change and took too many photos of this view- if that's possible. I woke up in the middle of the night and looked back out again for a few minutes. It's a view that I never tire of. Gorgeous.
And who can get tired of seeing and tasting macarons? Not me! Our friend stopped by a patisserie and picked an an assortment for the train ride. Here they are. So pretty and so delicious. Did you know that only the middle of a macaron has the flavor? The color is just for suggestion (except for the chocolate ones). These were especially colorful.
One of the highlights of our time in Paris was a meal at Benoit, an Alain Ducasse restaurant. We went to lunch and had great cassoulet, a delicious bean and meat stew. It's the best I've ever had. Okay, I say that every time we go there. After the meal, as we were having coffee, our waiter stopped by with the tray of just-out-of-the-oven Madeleines. They were perfect. It was so fun taking them from the pan tray rather than having them served on a plate. It was like sneaking them from the kitchen before they were ready to be served. Here's my quick snap shot.
Now you can make Madeleines too. I like them left out overnight so they're crunchy. Others like them soft, right from the oven. I think the second bite is always the best. If you need a mold, check with a local kitchen shop. Most stock them. Just ask for a Madeleine pan.
To print this recipe, click HERE
Madeleines
- 200 g melted butter (14 Tbsp) (cool and allow solids to settle )
- 4 eggs
- 170 gm granulated sugar (3/4 cup plus 2 Tbsp)
- 1 pinch salt
- 10 gm honey (1 Tbsp)
- 5 gm baking powder (1 tsp)
- 180 gm flour (1 3/4 cups plus 1 Tbsp.)
Melt butter and cool.
Sift flour with baking powder. Mix sugar and eggs to near ribbon stage. Add vanilla, lemon/orange zest. Add flour. Fold into egg/sugar mixture. Add honey. Add butter, leaving milk solids in container. After mixing, place in refrigerator to cool slightly/stiffen. Butter molds well, then flour. Place molds in refrigerator to firm butter if necessary. Use a pastry bag if needed to fill molds about 2/3 full in an oval top to bottom in the center of the mold. Bake at 350 for about 6 minutes or until puffed and golden. Immediately tap/rap on counter to knock madeleines out of pans and cool on wire rack. 1 recipe fills 2 molds.
If you're heading to Paris, be sure to check out my Paris Notebook. There are suggestions on places to go, eat and help with shopping for cooking equipment and more. I'll be adding more info and photos our most recent adventures.
Be kind, and enjoy!
Hazelnut Maple Cookies (Wheat free!)
Here in Wisconsin it's been a long, cool spring. This week we've started to signs of Spring. My hens & chicks are popping out of the antique typewriter, the daffodils are blooming, and the strawberry plants are peeking through the soil.
Long before the plants were popping there was another sign of Spring. Maple syrup season. Wisconsin is on the edge of the maple syrup belt. Like coffee and chocolate is to the equator, there are few places on earth that support this product's production. The temperature must be above freezing in the day, and down to about 20 F at night. Sap runs into buckets or through hoses to be boiled into the liquid gold.
The land we live on was once a maple syrup farm. When we walk through the woods, we see tubing and pans from years and years ago. So far, we haven't tapped any trees, but someday we'll give it a try. Did you know that it takes gallons and gallons of sap to make just one pint of syrup? I was lucky to get to watch a sap cooking session this year - with a taste of the sap. It's much lightly sweetened water, almost like a fresh coconut water.
Now, on to the recipe! I promise there's a connection here.
Back in January, I went to a class in Brooklyn for a class. After class I met up my niece and her beau, they told me about "the best bakery in Brooklyn". Ovenly. They told me all about the gluten free items and raved about the cookies. I was hoping to get there during my stay but it didn't work out. Instead, I contacted the bakery when I got home to ask about their cookies. Would they share a recipe? You bet! And, it's a perfect recipe for spring. Delicious nuts, and sweet maple syrup.
It wasn't until about half way through the preparation that I realized these are gluten free. The cookies are amazing. A perfect tea time afternoon pick-me-up, or great for travel.
I didn't have any hazelnut flour on hand (who does?), so I ground the nuts in the food processor. I was about 2/3 cups short, so I made up the difference with almonds.
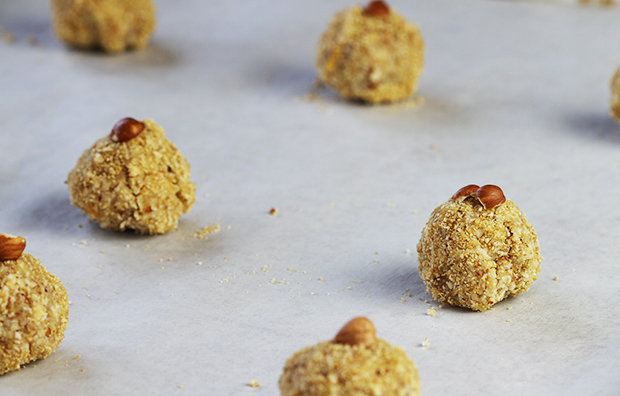
The nuts are blended with the egg white, zest, sugar and touch of syrup. Rolled into ping-ping sized balls, then rolled in the maple sugar and topped with a hazelnut half. Easy and fast. Here the the cookies ready for the oven. I would suggest pushing the nuts into the cookies just a little more. They look nicer that way.
After 12 minutes, and the best smell from the oven, the cookies are finishes. The maple sugar melts and creates and a crisp crust, with the nutty inside, perfectly baked. Wish you could smell them! The orange zest is a great addition, be sure not to leave it out.
Thank you to Erin and Agatha for sharing this great recipe, and Lauren for the tip. When you're in Brooklyn, stop by and see them. Their flagship shop is at 31 Greenpoint Ave., Brooklyn.
I hope you enjoy the cookies as much as I did!
Happy Spring!
To print this recipe, click HERE
Hazelnut Maple Cookies
Ovenly Bakery - Brooklyn
Ingredients:
4 1/3 cups hazelnuts
1 cup sugar
1 tablespoon maple syrup
zest of 1/2 orange
3 egg whites
Maple sugar for coating cookies
hazelnut halves for garnishing cookies
Instructions:
Preheat oven to 350 degrees F. Line a baking sheet with parchment paper and set aside.
In a food processor, pulse the hazelnuts until they form a coarse meal; the pieces should not be larger than about 1/8 inch in diameter. Transfer the ground nuts to a bowl. Add the sugar, syrup,egg whites and zest. Using a rubber spatula, mix the ingredients together until well combined. Cover the dough with plastic wrap and let sit until slightly dry to the touch, about 10 minutes.
Using your hands or a small scoop, form or roll the dough into 1-ounce balls. Coat in maple sugar and top with a half a hazelnut by pressing it into the dough. Place on the prepared baking sheet and bake for 12 minutes, turning at 6 minutes. Let cool completely
Mocha Chocolate Chunk Cookies
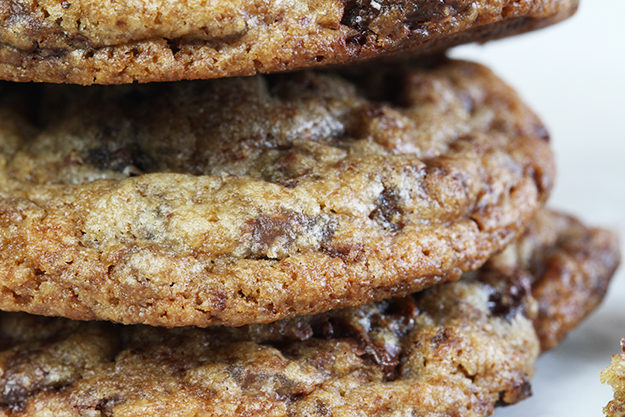
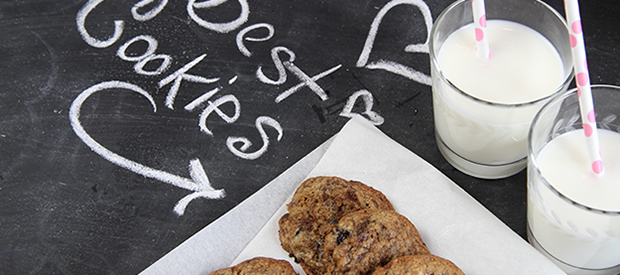
Every now and then a recipe comes along out of the blue that sweeps me off my feet. I was in the bakery catching up some Tuesdays with Dorie recipes when POW theses cookies came along. Soft, crunchy, chewy, chocolaty, a hint of coffee... I love them.
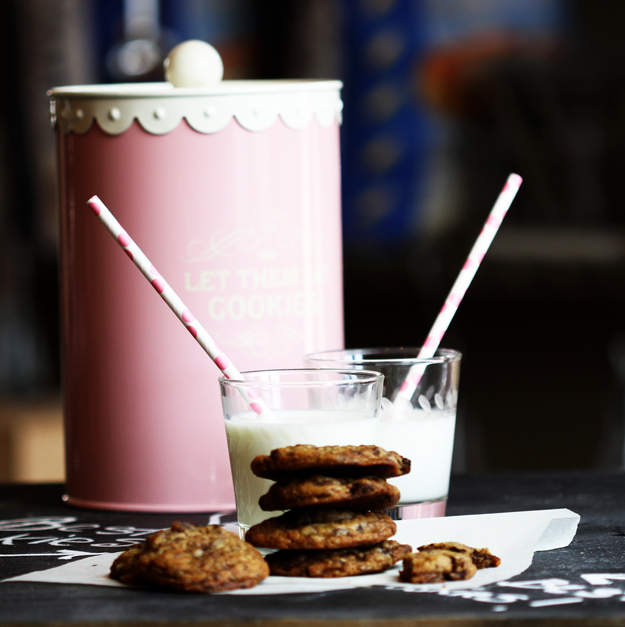
For those of you who are new to my blog, I'm part of the group of bloggers who are baking our way through the book Baking with Julia, by Dorie Greenspan. Twice a month we make a recipe and blog about it, linking to the big site Tuesdays With Dorie. We get to make recipes we may not have otherwise tried, and some that we've made lots of times. You'll always have link to the host for the week who provides the recipe. You might even peek ahead and bake along with us. You're always welcome to join me and comment on your baking successes...or challenges.
The recipe calls for dried apricots. I usually have some around, but not today. As I looked through the cupboard, I found a big bag of dried plums - better known as prunes. They were soft, and plump and with the dark color, perfect for the cookies.
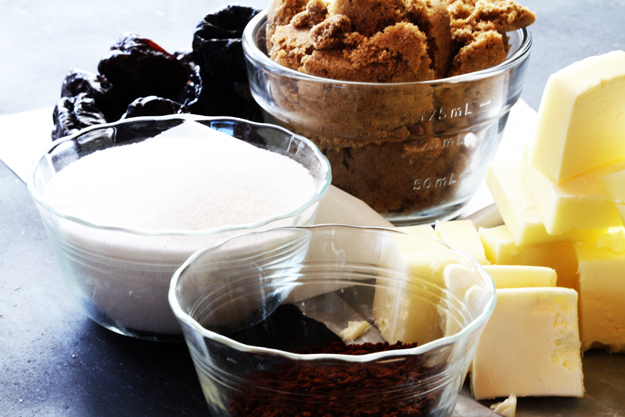
Another wonderful attribute to the recipe is that it calls for chocolate which is chopped rather than chips. I used chopped dark chocolate 58%. Some big chunks, dust, and little pieces. I prefer chocolate chopped rather than chips in most cookies.
The recipe assembles easily. Cream the butter and sugars, add the eggs, stir in the dry ingredients, then the chopped prunes and chocolate. My dough was still very cool after it was mixed so I didn't chill it as the recipe suggested. The cookies baked to a great color in 12 minutes, just as directed.
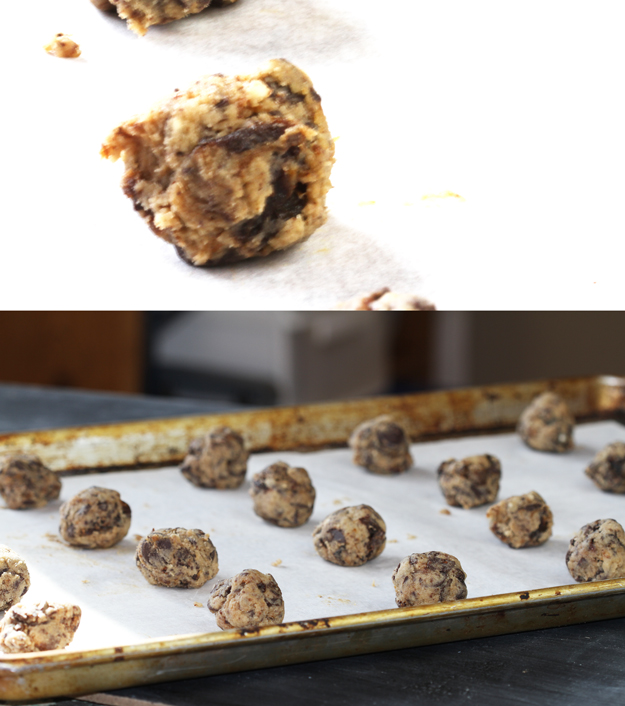
There's no need to squish or smoosh the cookies. The balls of dough are about the size of ping pong balls.
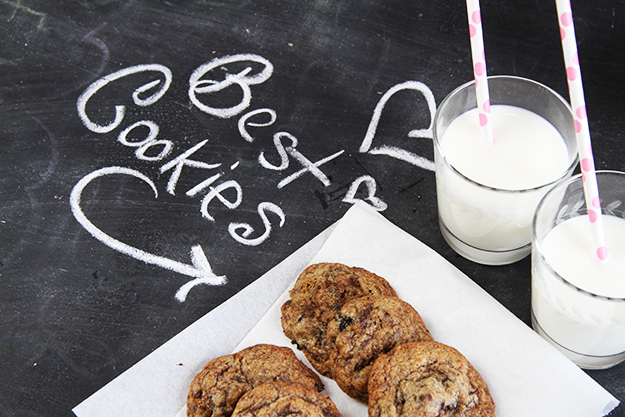
The fruit disappears into the dough and adds a texture and sweetness which compliments the coffee and chocolate. As we wait for the arrival of spring and temperature to warm, these will warm your heart. Enjoy!
You can find the recipe at Galettista by our host Peggy.
Valentine Cookie Swap
Happy Valentines's Day! I love Valentine's Day. I've always loved it. From elementary school shoe boxes filled with sweet notes from classmates, to a Valentine Card and little present on the kitchen counter from Gary, I love it. One of my favorite memories was walking into our kitchen for supper when I was about 8 on Valentine's Day. My mom had hung lime green polka dot patent leather tote bags on the backs of our chairs. The bag had a sleeve on the outside that held a matching umbrella. So sweet. And so Doris Day! Another reason I love Valentine's Day? It's Eddie, my dog's birthday. Yes, we talked about naming him Romeo, Valentine, and many other more romantic names, but he was and always will be, Eddie. Here's the birthday boy. He's 1/2 German Shorthair and 1/2 Blue Heeler. And quite a guy. Today he's seven, and acts like two.
Our French Friday's with Dorie group decided to have a cookie swap to celebrate the day. The swap was organized by Alice. (Thanks, Alice!) We each got the name of the Valentine, and made them a dozen cookies. The box also included a recipe, and a little present.
My box arrived, and was so fun to open! Susan Lester had my name. Inside the big box was TWO boxes of delicious cookies, a pretty ceramic heart, complete with rose petals, and a tres jolie Valentine. Thanks, Susan! Her blog is CreateAmazingMeals.com She knew just the right theme. An Eiffel Tower and I'm in!
The cookies are fantastic! Chewing, very flavorful and perfect for an evening snack. Ok, I ate two right away and am tempted to have another very soon!
Here's the recipe from Susan:
To print this recipe, click HERE
Inspired by Marcel Desaulniers “Mrs. D’s Chocolate Chip Cookies” from Death by Chocolate Cookies.
Preheat oven to 300 degrees F.
In a stand mixer, at medium speed, for 4 minutes, cream
½ pound Butter, softened
2 cups Dark Brown Sugar
When light and fluffy, scrape down the sides of the bowl and blend in:
2 teaspoons Vanilla Extract
1 Tablespoon Dark Rum (we use Myer’s)
2 Eggs
When thoroughly blended, add:
4 cups All-purpose Flour (we use King Arthur)
½ teaspoon Salt
1 ½ teaspoon Baking Soda
Start on low speed, slowly increasing to medium-high.
When dry ingredients are completely mixed in, add:
2 cups Semi-sweet Chocolate Chips (we use Ghirardelli)
1 cup Walnut pieces
1 cup Pecan pieces
Drop cookie dough onto parchment paper-lined baking sheets (about 1 ½ Tablespoons).
Bake for 25 – 30 minutes, according to your preference.
Recipe from: www.createamazingmeals.com
I hope you'll make these and visit Susan's site for more recipes and ideas. Happy Valentine's Day! Be kind.
Fig Cookies (aka Newtons)
Happy Holidays everyone! It's only a few days for Christmas, and I'm thinking this may be my last post before the holiday. I'd like to start off by wishing you all the best of the season and many thanks for reading and supporting my blog.
We've shoveled out from Thursday's blizzard and are ready to brave the stores to select presents for friends and family. Nope, we're not late or under pressure. This is the way we do it. In fact, one of our first dates was shopping together one day after work on the 23rd of December. I'm sure our trip will include lunch of sushi!
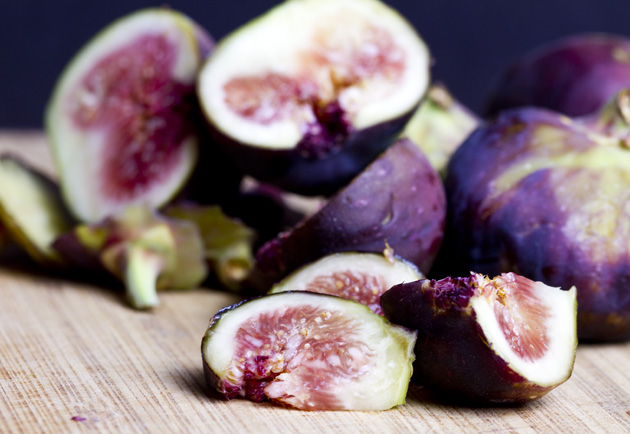
Figs are high on my list of favorite holiday foods. I think I stumbled upon them about ten years ago in a fancy-schmacy grocery and bought a few. Add some stilton, pears, port and a fire in the fireplace and it's perfect. Speaking of favortie things, I have one question. Why is Favorite Things considered a holiday song? Because of the warm woolen mittens? Geeesh. I love Julie Andrews, but I think it's a stretch. Back to the figs. I picked up three small boxes, brought them home, and then came across a recipe for Fig Cookies with red wine. I'm in!
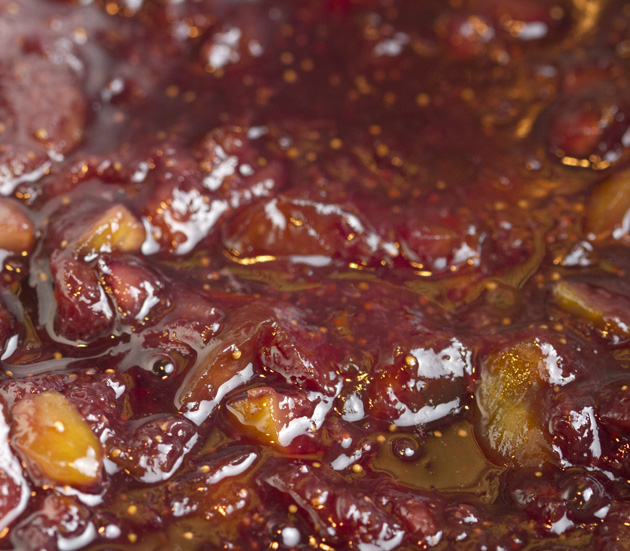
You can start out with your dough or figs paste first. They both need to cool/chill so it won't really matter which you start with. I started with the paste. Chop the figs and open a bottle of red wine. Hmmm, what to do with the rest of the bottle after the 1 1/2 cups are in the pan?
Once in the pan, I added a pinch of salt to bring out the sweetness. You could also add black pepper or some anise seeds depending on your like/dislikes in the spice area. Simmer the figs until they're soft and the syrup if reduced it about 1/2 cup. It's hard to tell how much liquid is left, but tip the pan and when the syrup is almost gone, call it. Let mixture cool in the pan while you prepare the dough.
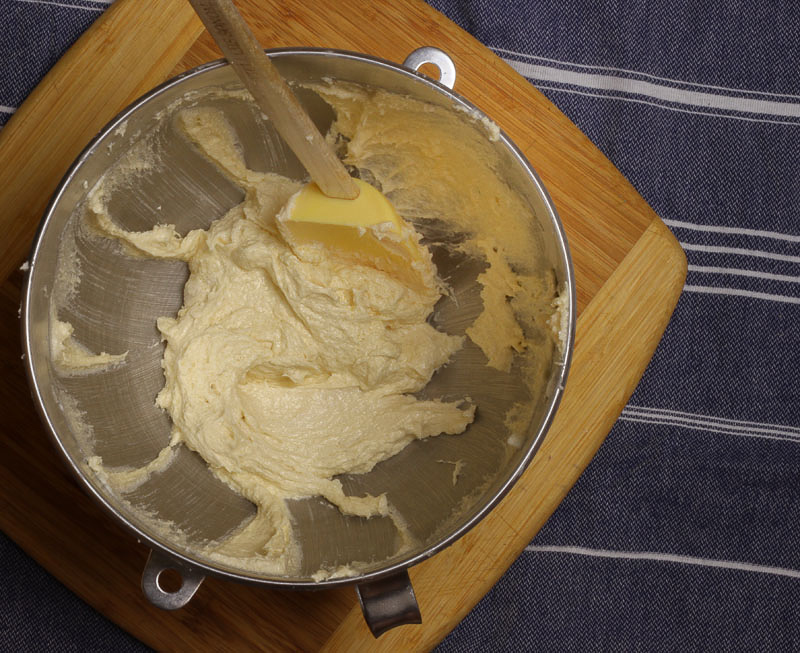
Now on to the dough. You can use a stand mixer, or hand mixer. Cream the butter and sugar and mix until light and fluffy. Add the salt, vanilla, zest., mix. Add the egg. Mix to combine. Mix in the flour just until the dough comes together. Flatten the dough in a rectangle and chill for about 30 minutes.
While the dough is chilling, you can puree the fig paste in a food processor or blender.
Notice how red the spread looks. I was a little worried at first, but it darkens when it cooks. This is a good time to preheat your oven.
Using floured parchment paper. Roll the dough about 12inches long and about 14 inches wide. If it's easier, you can do this in two parts, so the dough is 12 x 7 or so. It should be about 1/8" thick.
Now for the tricky part. Make 3 inch wide strips, and pipe the filling about 1/2 inch down the center. Resist the temptation to use too much filling. If the dough feels too sticky or warm, don't hesitate to pop it back in the refrigerator for a few moments.
Fold the strips to the middle, slice into cookies and place seam side down on the parchment-lined baking sheet. I had a fair amount of scraps that I baked just for fun.
After 20 minutes at 350 degrees F, the cookies was perfect! Golden on the bottom and very fragrant. I knew they were super hot, but I had to try one right of the oven. It was so, so delicious!
To print this recipe, click HERE
Fig Cookies
Fig Filling
1 1/2 cup chopped figs (about 10 ounces)
3/4 cup red wine
1/3 cup sugar
1 tsp lemon zest
1/4 tsp salt
1 4/ tsp black pepper or 1/2 tsp anise seeds (optional)
Dough
1 stick unsalted butter, softened
1/2 cup sugar
1 tsp vanilla extract
1 tsp grated lemon zest
1/2 tsp salt
1 large egg
1 1/2 cups all-purpose flour
flour for dusting/rolling
For the Filling:
In a saucepan, combine all all the filling ingredients. Bring the mixture to a boil, then reduce to a simmer. Simmer until most of the liquid has reduced and the figs are tender. The spread will have about 1/2 cups of liquid with the soft figs. Allow the mixture to cool in the pan while you assemble the dough.
For the Dough:
With a mixer, mix the butter and sugar until it’s light and fluffy. Add the salt, zest, and vanilla and mix. Add the egg, and mix. Reduce the speed of the mixer and add the flour. Mix until just combined. Remove the dough from the bowl, and make 1 or 2 rectangles. Wrap with parchment paper and chill for 20-30 minutes or until cool and firm to the touch. It’s a little easier to work with two smaller pieces of dough.
For the Cookie Assembly:
Preheat your oven to 350 degrees F. Place a rack in the center position.
Dust a piece of parchment paper (large enough to roll the dough on) with flour. Place the dough on the parchment, dust, and cover with another sheet. Roll the dough to approximately 1/8” thick. You should have a rectangular shape, 12” tall and about 7-12 inches wide depending on the size of your piece of dough. Carefully cut the dough in 3 inch wide strips. Don’t worry about separately the strips. Using a pastry bag or plastic big with a 1/2 “ tip, pipe the fig filling down the center of each strip about 1/2” wide. Be careful not to overfill the strips.
If the dough is soft, you may want to re-chill for 5 minutes or so. When you’re ready, carefully fold the side of the strip toward the center. Slice the strip into cookies, about 1 1/2 inches long, or to your preference. Place on a parchment-lined baking sheet seam side down. Bake for 20 minutes, or until the bottoms of the cookies are golden brown. Repeat if you used two pieces of dough.
Makes 24-36 cookies, depending on size (and rolling/folding skill)
Adapted from Food and Wine Magazine 2012
Snickerdoodles
Happy Labor Day! No matter what or how you're celebrating, happy day to you. Is it really time to stop wearing white pants and put away summer purses? Is that still a rule?
Here in Wisconsin, many schools start after Labor Day. It was mostly due to farming, but now it's mostly due to tourism wanting to keep high school and college employees through the holiday weekend. My college student employees are starting an returning to school this week. I'll miss them very much. I loved their bright, happy, eager and always cool personalities. Their absence will give me time to rid my vocabulary, of really, and seriously-right? I guess those are better, than like!
I'd like to sent them off with some cookies. They've all got the bug to bake, and now they can stop by anytime to grab the recipe. Here's a good, old fashioned, get-a-glass-of-milk cookie, Snickerdoodles.
The cookies made by whipped together soft butter and sugar, adding the vanilla and cinnamon, then the egg.
After the butter and sugar are creamed/whipped together, add the cinnamon and vanilla. Adding it now will increase the flavor of the two spices. Then add the egg, and mix well.
Lastly, add the dry ingredients, and stir to mix. Don't overmix, you want your cookies to be crisp and crumbly, not bready.
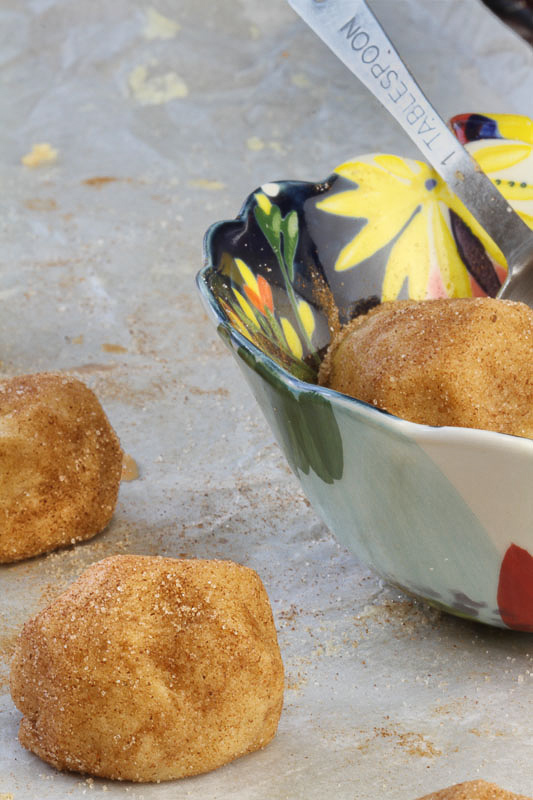
Now into the frig for 1/2 hour. Please don't skimp on this part. If you do, the cookies will spread too fast and be a big mess on the baking sheet. The chill will slow them down and they'll be just right. If you wait to turn on your oven, you'll have no other choice than to wait! Roll the dough into little balls, and then roll in cinnamon and sugar.
Then into the oven for 10-12 minutes. I like mine more on the crunchy side so I went with 12 minutes at 375 degrees F. Let them cool as long as you can stand it, and enjoy! Have a great school year or wherever your life may be taking you. Thanks to Jess, Orla, Phoebe, and Stacey for a fabulous summer!
To print this recipe, click HERE
Snickerdoodles
3 cups flour
2 tsp cream of tartar
1 tsp baking soda
1/4 tsp salt
1 3/4 cup sugar (divided)
2 sticks (16 Tbsp) butter, unsalted at room temperature
5 tsp cinnamon (divided)
1 1/2 tsp vanilla extract
2 eggs
In a standing mixer bowl, or with a hand mixer beat the butter and 1 1/2 cups sugar until it's pale and fluffy, about 2 minutes, then add 2 tsp cinnamon and vanilla and beat about 1 minutes longer. Scrape side of bowl a few times to make sure all the butter is combined. Add the eggs and mix completely.
Add the dry ingredients and stir gently to combine. Don't overmix. Refrigerate the dough while the oven is preheating.
Preheat your oven to 375 degrees F. Center the rack.
Roll the dough into walnut (1 TBSP) sized balls, and roll in the remaining sugar and cinnamon, which you've mixed together.
Set on a parchment-lined baking sheet about 2 inches apart. Bake for 10-12 minutes, or until golden brown. Move to a wire rack to cool, then store in an air tight container for up to three days.
Makes about 48 cookies. Adapted from Saveur, The New Comfort Food.
