Angel food cake is a favorite of many! Learn to make this delightful cake from scratch. Take the free class for creating perfect fluffy angel food cake frosting.
Read moreThe Great Wisconsin Baking Challenge Week 1
Week 1 of the Great Wisconsin Baking Challenge. Let's do this! Here's this week's Drizzle Cake, by Paul Hollywood.
Read moreBlog Creation Class
What a fun summer day! Friends Old and New joined me for a fun day in the country.
Read moreBirthday Week
It's Birthday Week!
Warm winter wishes from Wisconsin! It's -10 degrees as I write this post. The sun is shining, the birds are chirping away at the feeders and it's cold, really cold! But enough about the weather. It's been awhile since I've written a post. It was late November to be exact. I'm not sure why it's taken me so long, but I'm back and feeling really energized and ready for the new year. I know it's almost February but it's a new year for me.
You see, this is my birthday week. I don't know about you, but I like to look back on the year's events and changes, then look ahead to the new year with goals, aspirations and plans.
What a year it was. Here's the quick recap. In February, I lost my mom to complications of MS. It's a loss no one can prepare you for. Then in April, my dad moved in with us. Another change, and one I won't trade for anything. He's a wonderful additional to our household. An avid gardener and golfer, he's got a contagious joy for life. Later in April, Skyhouse Publishing offered me the book contract and I spent the rest of the year writing, testing, and photography the recipes for my book. (I don't have an exact release date yet, but it will be sometime in September 2014. I promise to keep you posted.)
The year was sprinkled with travel and the pleasure of meeting many new friends. In September, I traveled to Ireland to participate in Angela Ritchie's ACE Camp to learn more about photography and food styling from Beatrice Peltre. Gary, my dad and I made a trip to Las Vegas early this month. And, I've just returned from Salt Lake City where I attended ALT Summit.
What's that, you ask? It's a conference for the blogging community filled with workshops, parties and the opportunity to learn more about this crazy blogging world and social media. I have to admit, I was very nervous. World famous lifestyle, fashion, and craft/DIY bloggers? The experts on nail polish, hair, shoes and just the perfect outfit? Yikes! As it turned out, it was a wonderful group of mostly women. They were kind, intelligent, generous and enthusiastic about the internet blogging world.
One of the highlights was a dinner hosted by one of the sponsors Gygi. It's a family owned SLC kitchen/restaurant supply store with a beautiful space for cooking classes. Kelsey Nixon, from the Food Network and Cooking Channel lead us through a few of her recipes. She has a new book, and the recipes are great. In the photo below, it looks like we're the same height. I'm actually crouching down about 12 inches! She's tiny and just as lovely in person as her TV persona. The kitchen was decorated in a birthday party theme (perfect for me!).
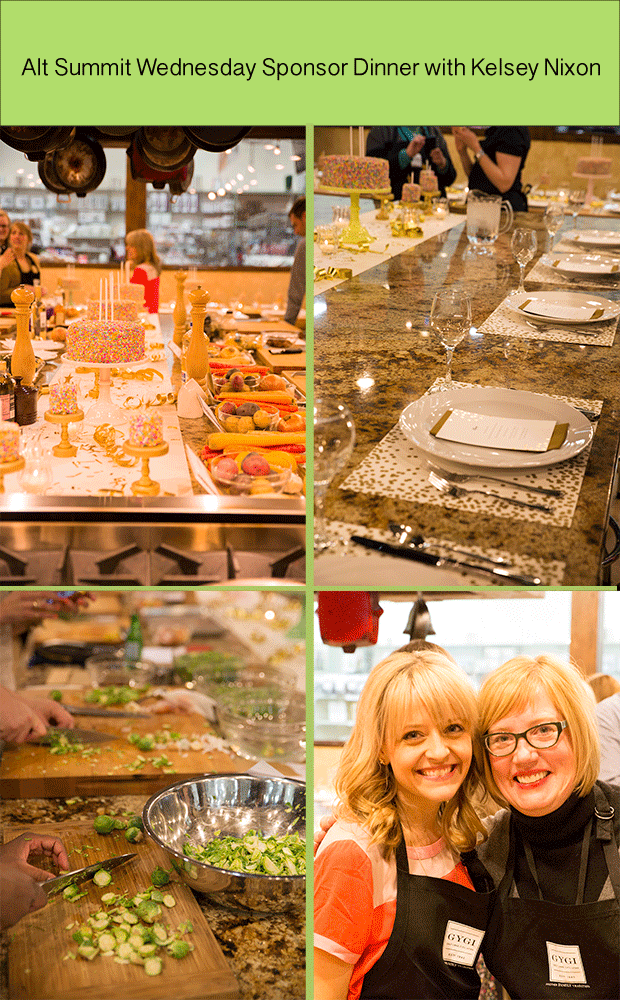
As you can see in the photo above, we made a Brussels Sprouts side dish. It included maple syrup and pecans. It was one of my favorite parts of the meal. If you've interested in her book, you can find it on Amazon, or your favorite source.
To view to recipe online, you can find it here on Scribd.
What's new for my next year? Book editing and release, and more frequent and diverse blog posts. If you've made it this far, I'd like to ask a favor. What you would like to see in my posts? Any recipes or topics you're looking to learn more about? Just leave a comment and let me know. I'm trying to add more posts to my Pinterest boards, and Little French Bakery Facebook page. I hope you'll check them out and follow along.
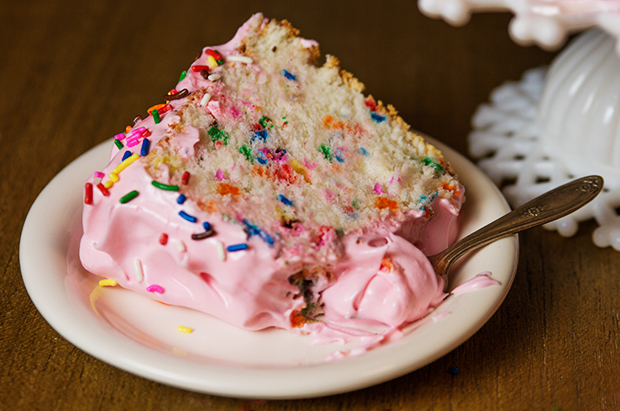
Last year I posted my Confetti Angel Food Cake Recipe on my birthday. If you're looking to celebrate with a fun cake, I think you'll enjoy the recipe.
Thank you for your support over the last year, and here's to the next chapter!
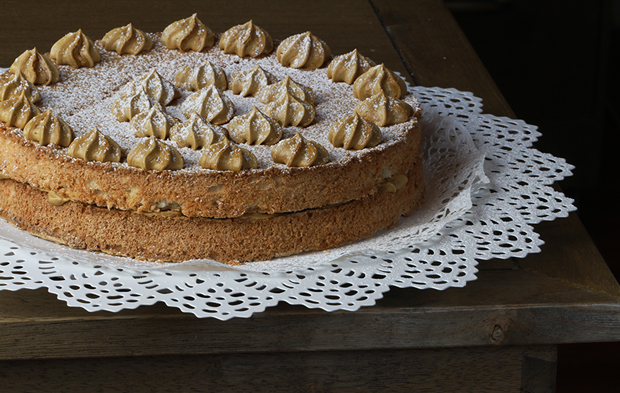
Dacquoise au Cafe (Almond Merengue with Coffee Butter Cream)
Every year about this time I get a little sentimental. Perhaps more than a little. Fifteen years ago I arrived in Paris ready to begin a journey that changed my life. There's something about the sights and smells of late summer that trigger the memories of walking to the Metro each morning, with excited and nervous butterflies in my stomach. What amazing technique and pastry were we going to learn? Would I be able to understand the Chef? And, could I get through the day blunder free?
The day we made this pastry in class, it was an evening kitchen session. Our main chef had gone for the day and we had another chef, from another school guest teaching the class. I sound like a broken record, but once again he was very handsome and had even better cologne than the pastry cream chef. To top is off, he wasn't wearing the usual navy blue houndstooth checked pants. His pants were navy blue pin striped. Kim and I secretly called him Fancy Pants. He was very nice, and very helpful. (Can you see the crush coming?).
Our class gathered our ingredients and proficiently made the dacquoise without fail. Then came the cream de beurre, or buttercream. Since we didn't use mixers, we needed to bring the sugar and water to the soft ball stage, and somehow pour it over the egg yolks waiting in the bowl at our work station, a distance of about seven feet.
The chef, Kim and I had been chatting (in our best caveman French),trying to be welcoming to our guest. While I was bringing my sugar to temp, he walked over to make sure the next step was successful. I remembered earlier in the day that our Chef had shown us a way to measure the sugar stage by dipping a flat sieve/skimmer into the sugar and blowing into it. If you can make bubbles, out the back, your sugar is at temp. Amazing. I asked our evening Chef about it, and he said "Oui!" So I gave it a try, and to my amazement, it worked. Now I had sugar at the soft ball stage ready to pour it on the yolks. The chef stood beside me... and I froze. "Je poulet, Chef", I said. I wish I could show you the look on his face. Just think about the look a dog gets when you talk to them and they tip their head to the side. Happy, but completely confused. "Poulet?", he said. My friends across the room roared with laughter. I was trying to tell him I was chicken. Guess what? That means nothing in French. One of my French speaking classmates came to my rescue and explained to the Chef that I was afraid to pour the sugar. He smiled and chuckled. I poured the sugar, and began whisking the mixture until it cooled and then added the butter. The buttercream was quite possibly the best thing I had ever tasted. Smooth and rich with the hint of coffee. And best of all, I had just made it.
While we were working the Chef demonstrated how to make marzipan roses using the back of a tablespoon. In addition, he made a few small animals, often seen in patisserie cases.
We assembled our desserts and presented them to the Chef for grading. As we were boxing our dessert and preparing for the Metro ride back to the hotel, the Chef walked up beside me, and with the biggest smile, set a little marzipan chicken of the workstation. "You are my favorite Chicken", he said. "Merci, Chef", I replied and I'm sure blushed six shades of red. I still teach students how to make roses, dacquoise and buttercream. And best of all, when Kim and I are together we often reminisce about Fancy Pants.
I've been wanting to share this recipe with you for a long time. It's an incredible dessert. It's pure classic French pastry. Simple ingredients combined together to make compenents. Combined together, you won't believe how elegant yet understated it tastes.
Dacquoise is a nut based merengue sponge cake, which make it naturally gluten-free if that's important for you. You can use all almonds, hazelnuts or a mixture. The key is to make great egg whites.
Start with almond flour, sugar, a dash of salt, a dash of cream of tartar and eggs whites.
For the very best merengue, start with eggs whites at room temperature or just a bit above. Start whipping them slowly, then gradually increase the speed. Once they reach soft peaks, add the sugar all at once and increase the mixer speed (or find a new set of arms if you're whisking by hand), and whisk until the peaks are firm and shiny.
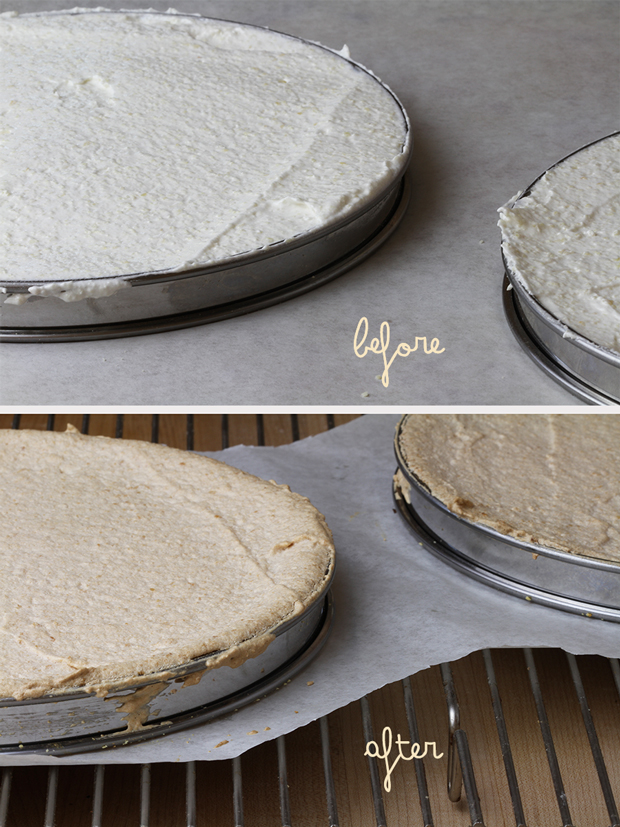
Fold in the nut mixture, then spread in a ring, or a springform pan ring. If you don't have either one, just draw two 10 inch circles on a piece of parchment paper.
I highly suggest waiting until the dacquoise is cool before starting the buttecream. That way, there's no chance you'll be tempted to pipe the buttercream on warm cake.
Be sure your butter is at room temperature. Heat the sugar and water in a saucepan to 238 degrees F, or 118 degrees C. Pour the hot sugar over the whisked egg yolks and whisk until lightened and cool. Then start whisking in the butter bit by bit. This is much easier with an mixer, but it can definitely be done by hand with a whisk. You may need a helper to hold the bowl while you whisk in the hot sugar so your bowl doesn't scoot away.
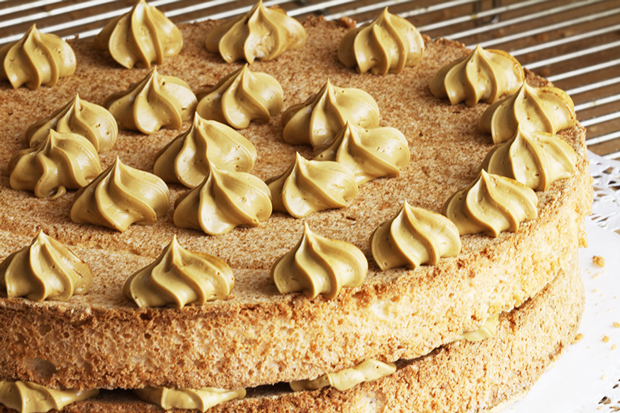
To finish the dessert, use a thin knife with the blade pointed toward the edge of the pan, and carefully cut the cake away from the edge. Place on a plate, and pipe several rosettes of buttercream. Be sure to pipe a ring of rosettes near the edge. Set the next layer on top and garnish with more rosettes of buttercream. If you have some chocolate coffee beans, or nuts, add one to each rosette.
Serve immediately, or chill and serve.
I hope you'll give this recipe a try. If you've never had real French buttercream, you're in for a treat!
To print this recipe, click HERE
Dacquoise
Makes two 10 inch circles
8 egg whites plus 80 gm granulated sugar (6 1/2 TBSP) -to make merengue at the end of whipping
140 gm (1 2/3 cups) almond and/or hazelnut flour
60 gm all-purpose flour (2/3 cup) OMIT IF MAKING GLUTEN FREE, and substitute almond flour
1 dash salt
1 dash cream of tartar
100 gm (3/4 cup) powdered sugar
Preheat your oven to 350 degrees F. Line baking sheet with parchment paper. Bring the egg whites, cream of tartar, and salt to soft peaks. Add the sugar and increase speed until firm, and glossy peaks. Fold in the nut flour. Spread in the rings, or spread in the circle, about 1/2 - 3/4 inch thick. Bake for 30 minutes, until golden brown. The dacquoise will rise and then settle back into the ring. Cool completely. Peel off the parchment paper, and carefully remove from the rings.
For the Buttercream:
4 egg yolks, from large sized eggs
200 gm butter (14 tablespoons), at room temperature
230 gm water (just less than 1 cup)
170 grams confectioners' sugar (1 1/3 cups)
In a mixing bowl or the bowl of a standing mixer, have the egg yolks ready. Be sure the butter is at room temperature.Have In a small saucepan, place the water, then the sugar and heat to 238 degrees F. Use a candy thermometer to check the temperature.
When the sugar/water reach soft ball stage, slowly pour it over yolks, whisking continuously. Continue whisking by hand or with the whisk of the mixer, until the mixture is cool. If you feel the bottom of the bowl, you'll feel that the mixture is cool.
Add the butter one to two tablespoons at a time, incorporating well after each addition. If the mixture breaks, keep mixing. It will come back together. Add the coffee extract to taste. The buttercream should be a rich coffee color, with a nice coffee taste.
French Coffee Extract (Essence de Cafe)
200 gm granulated cane sugar (1 cup)
200 gm water (7 oz)
100 gm instant coffee (1/4 pound or 1 7/8 cup) Nescafe is best
Dissolve the instant coffee in the water and bring to a boil. In another saucepan,add the sugar and heat to cook until very dark caramel color (very dark amber). Stop the caramel by adding the hot coffee. The mixture will bubble, spit and sputter. Be very careful to protect your hands and fingers. Add the coffee slowly, and stir lightly to dissolve any hard caramel bits. Strain the mixture and cool. Pour into bottles, and store in refrigerator.
Ice Cream Cone Cupcakes
It's just after July 4th, and we're in the full swing of summer. Our days are hot, long and fun. I don't know about you, but our grill is barely getting a chance to cool down between uses. My new favorite cologne is a mixture of sunscreen and bug spray. Our garden flowers are growing by leaps and bounds. It's such a nice time of year! Over the July 4th holiday, I made some treats perfect for a silly summer day. Ice cream cone cupcakes. I don't know where she learned about them, but my mom made these for us for as long as I can remember. Who knows? Maybe she invented them!
She'd stand the cones up in an 9 x 13 pan, fill them with batter, bake and frost.
They're the perfect eat-it-all snack. Kind of goofy, and very easy.
I needed someone to help me with the cupcake display, so I asked for some help from my little friend Maeve. Her outfit (self-selected) fit the occasion and the spirit of the dessert and holiday.
Things have changed on the ice cream cone cupcake scene. You can now purchase a stand to support the cones while they're baking in the oven. No more tipped cones! The stand is also perfect for transporting your tasty treats.
For my cupcakes, I used a standard chocolate cake recipe. Use any recipe you would use for cupcakes. I filled the cones to just below the top section of the cone. You really don't want to overfill them, they'll spill over and make a mess. In fact, set the rack on a baking sheet just in case a cone or two go up and over the cone.
Once the cakes are cool, ice them with your favorite frosting and decorate with a sprinkles. What could be more fitting to enjoy a cupcake in the grass, than a fluffy skirt, sparkle necklace and stars on your tiara! I hope you'll make a batch and take them on your next picnic or backyard adventure!
To print this recipe, click HERE
The Little French Bakery's Chocolate Cake Recipe
Ingredients:
Makes about 2 dozen "Ice Cream Cones", or 2 eight-inch round layers
3/4 cup plus 2 Tbsp cocoa
2 eggs
1/2 cup vegetable oil
1 3/4 cup all-purpose flour
1 cup skim or 2 % milk
1/2 cup warm water
1/2 cup hot brewed coffee
1 1/2 tsp baking powder
1 1/2 tsp baking soda
1 tsp salt
1 Tbsp vanilla extract (real, not imitation)
Directions
Preheat your oven to 350 degrees F. Be sure the oven rack is centered in the oven.
In the bowl of a stand mixer fitted with the paddle attachment, or a medium sized mixing bowl, combine dry ingredients. Whisk to lighten and mix. Add eggs, oil, milk and vanilla. Using the stand mixer, a hand mixer beat batter on low to medium speed for 1 minute. Stop, scape the bowl's sides and bottom be sure all ingredients are well mixed. Beat for another 30 seconds. Carefully add the warm water and coffee. Switch to a spoon or spatula and throughly mix the liquids into the batter. The batter will be thin in consistency.
Spoon/pour the batter into the cones, do not fill more than half full. Bake 12-15 minutes, until a toothpick inserted into the cupcake is clean, and the cake springs back to the light touch. Be careful not to over-bake.
This recipe was adapted from the famous recipe on the Hershey Cocoa can. It's wonderful for cakes or cupcakes!
Rich Chocolate Cake (plus... a treat for gluten-free bakers!)
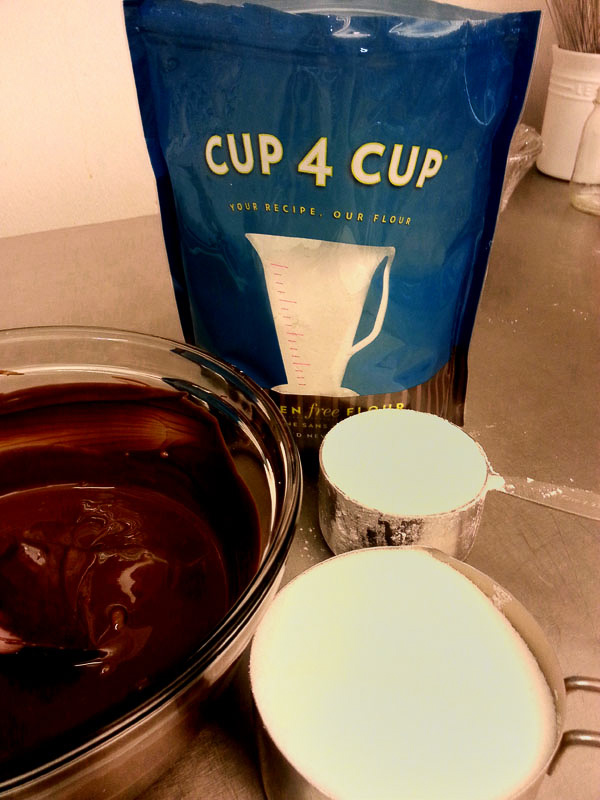
There's a chill in the air, and it's time to start baking! Something warm, comforting and delicious. Here's just the dessert. You'll love this one! I made this cake for Gary about 25 years ago. (and ever since...) It was a surprise for a his birthday. We weren't really even dating yet, but I think this may have sparked the flame. Our friends just celebrated their 45th anniversary and I made this for them. It's very romantic, and perfect for a party. The best news... I substituted Cup 4 Cup gluten free flour, for the wheat flour. It worked perfectly. No one could tell the difference including me. Here's the recipe that will make you a star as the holidays roll in. Everyone I know loves this cake. It's dense, very chocolatey, and even appeals to those who claim not to really like chocolate. You can serve it at room temperature or cold. Invite friends because one cake goes a very long way since it's so dense. The ingredients are pretty simple. Melted chocolate, butter, a dozen eggs, sugar and some flour. I bet I had you at melted chocolate. I used Cocoa Barry 58% French chocolate. Use any bittersweet/semisweet you like. Just not milk, it will be too sweet.
My Lost Crates box this month from Joy the Baker, included vanilla beans, vanilla extract and a big bag of Cup 4 Cup gluten free flour by Thomas Keller. When Chef Keller does something, it's always great. The flour looks and feels like wheat flour. No funny taste, smell or texture. I would highly recommend going finding some right away and giving it a try. If you have a moment, follow the link to Lost Crates. It's always a surprise and very fun!
To print this recipe, click HERE
Dark Chocolate Cake
14 ounces semisweet chocolate (the darker, the better
12 eggs, separated
2 cups granulated sugar
3 1/2 sticks butter, softened
1 cup unbleached flour, sifted (or 1 cup Cup 4 Cup flour)
Confectioner's Sugar for serving
Preheat your oven to 325 degrees F. Butter and sugar an 10 inch spring form pan. Tap out any excess sugar.
Break or chop the chocolate into small pieces and melt in microwave or in a pan placed over another pan of barely simmering water. Stir until smooth, and cool slightly. Be careful not to burn the chocolate.
Beat the egg yolks and sugar until they are pale and light yellow. When you lift the whisk or beater over the mixture, there should be a ribbon of the mixture that falls from the beaters and gently lays on top of the egg/sugar mixture. Add the chocolate and mix thoroughly. Stir in the butter, and flour.
In another bowl, beat the egg whites until they are stiff. Spoon a spoonful of the chocolate mixture into the egg whites and mix. Then add the egg whites to the chocolate mixture, folding very gently until mixed. Be very careful not to overmix, or deflate the batter.
Pour the batter into the prepared pan (it will come close to the top) and set on the rack (middle rack) and bake for 1 hour and 20 minutes. A cake tester or toothpick should come out clean when inserted into the center of the cake. The cake will rise and crack, but will settle as it cools. Cool on a rack for 15-20 minutes, then release the ring of the springform pan. Allow the cake to cool, then refrigerate until cold. It's best to wait until the cake is cold to remove the bottom of the springform.
To serve sift with powdered (confectioner's) sugar, and some whipped cream, if desired. Makes 20 servings (small... but rich)
Adapted from The Silver Palate Cookbook.
Here's the cake on it's pedestal at the anniversary get-together. I wish you could smell it... it's SO good.
I'd love to hear how your cake turns out! Cheers.
Nectarine Upside Down Chiffon Cake
this is my invariable advice to people: Learn how to cook, try new recipes, learn from your mistakes, be fearless, and have fun. Julia Child. From My Life in France.
This has been my mantra for the past week getting ready for this recipe.. Learn from your mistakes, try something new, have fun, try new recipes, have fun... be fearless. Got it!
As one of this week's Tuesday's with Dorie recipe hosts, my job is to provide the Nectarine Upside Down Chiffon Cake recipe, and give you the best tips and tricks I can. Marlise, from The Double Trouble Kitchen, is your other host. I've been wanting to be a host for a long time. I'm so happy to provide you with the recipe and be one of the "blogs of the month"! It takes me back to being the child in school who got to pass out the graham crackers, or put up the calendar numbers on the bulletin board. When I saw the title, my first reaction was, chiffon? Oh boy... I really wanted, and hoped it would be fine on the first try. After all, I'm supposed to know what I'm doing and be able to teach others. Time for some fun and fearlessness.
This is a grand, big girl/boy recipe. It's a boeuf bourguignon of desserts. Multiple steps, a few tricky details, and magnificent results. I know you can do it. Follow the recipe and the tips, and you'll have a great, fancy dessert to share.
The first step was to find a 10" spring form pan. I rummaged through my collection of pans, got out the ruler to measure, and ta-da... check. Don't be tempted to use a smaller pan. The recipe just fits into the 10" model. If you must, just don't put all the batter into the pan. It will be almost to the top.
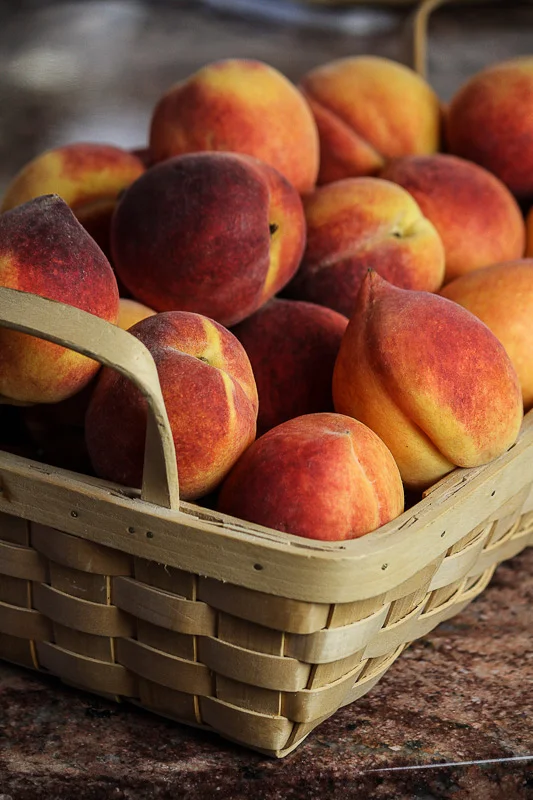
This recipe used the last of my vacation peaches. What a perfect recipe for such wonderful fruit. The recipe calls for nectarines, so what's the difference? Peach fuzz. I popped the peaches in boiling water, counted to 20, rinsed under cool water, and slipped off the peels. They were juicy, and perfect for the recipe.
You'll start the recipe by melting some of the butter in the bottom of the pan, adding brown sugar, and arranging the sliced fruit on top of the sugar. Not so bad at all. Be sure to wrap your pan in foil so the butter doesn't drip on to the floor of your oven when the cake goes in. Even with the best foil work, you may still have drippage.
Now on to the streusel. I used chopped pecans instead of almonds, and didn't toast them before adding them to the other ingredients. Add the ingredients to the food processor and pulse until you have nice clumps of streusel. The baking time of 12 minutes was perfect. The kitchen smelled great! Warm, buttery and delicious.
The third step is the chiffon batter. You'll be making a classic French meringue. Be sure your egg whites are in an extra clean bowl, free of any yolk specs. You may want to place the bowl over another bowl of warm water to gently warm the egg whites. They'll whip faster and fuller than if they're cold.
What makes this French meringue? Since the cake will be baked, the egg whites are not heated as they are in Swiss Meringue. The sugar in French meringue is not cooked (that's Italian meringue!). This meringue is medium peak egg whites whipped together at the end with sugar until shiny and firm. This is the easiest of meringues, but still requires special attention. Once your meringue is shiny, and firm, you'll fold it into the yolk mixture.
To fold: Hold your spatula perpendicular to the surface. Cut straight in and down, then follow the edge of the bowl, up and over the top allowing the whites and yolk mixture to gently fall from the spatula. Gentle! Rotate the bowl, about 1/4 turn and repeat. It will take several folds. The batter should be light and homogeneous.
Place 1/2 of the over the fruit, add all but a few tablespoons of streusel, then add and smooth the remaining batter over the streusel. The chiffon cake recipe states that it should be for 45-50 minutes. I checked mine at 45, 55...65...75...85...90... minutes. At this point, I was worried sick, and making plans for a redo, and writing the story in my mind about how I had tried and failed at this classic dessert. Remember... be fearless and have fun! Just past 1 1/2 hours of baking, the cake was firm to the touch and the toothpick came out clean. The surface was golden brown, but I had no idea of what the fruit and sugar were going to look like at the bottom. In another 25 minutes, I'd find out.
Twenty five minutes later, I attempted to release the springform ring. The edges were stuck and I was about to rip the cake. Whoops! I used a butter knife to gently release the cake from the side of the pan. It released perfectly, and was ready for the flip.
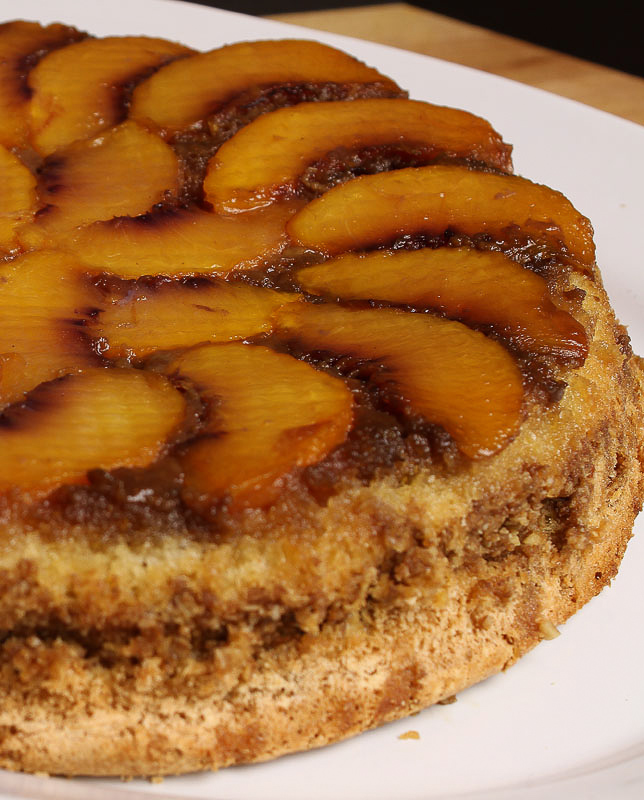
You can see the little dimples from the bottom of the spring form pan. A sprinkle of streusel and the beautiful chiffon cake was finished.
To print this recipe, click HERE
Nectarine Upside-Down Chiffon Cake
For the Topping:
1/2 stick (2 oz) unsalted butter
1 cup, packed brown sugar
3-4 ripe medium nectarines (the number will depend on size), each cut into 8 pieces
Center a rack in the oven and preheat the oven to 325 degrees F.
Cut the butter into 3 or 4 chunks and toss them into a 10 inch springform pan that's 3 inches high. Place the pan directly over medium-low heat and melt the butter, tilting the pan so that the butter covers the bottom evenly. Remove the pan from the heat and scatter the brown sugar evenly over the butter, patting it down with your fingertips. Arrange the nectarine pieces in concentric circles over the sugar. For a fancier effect, alternate the way the nectarines face from circle to circle. Wrap the bottom of the pan in aluminum foil to catch any butter that might drip during baking and set the pan aside.
For the Streusel:
1/4 cup unblanched whole almonds
1/3 cup all-purpose flour
1/4 cup packed dark brown sugar
1 tsp cinnamon
1 tsp ginger
1/2 stick cold unsalted butter, cut into small pieces
1/2 cup quick cooking oats, (not instant)
Put the almonds on an ungreased jelly roll pan and bake them until golden brown and fragrant. About 10-15 minutes. Stir frequently so that they toast evenly. To test for toastiness, break on open, it should be light brown in the center. Cool the almonds before proceeding.
Line the jelly-roll pan with parchment paper and keep at the ready.
Put all the struesel ingredients, including the almonds, into the work bowl of the food processor fitted with the metal blade and pulse just to mix the ingredients and chop the almonds and butter. The mixture will be rough and crumbly. Spread the streusel out on hte pan and if you'd like to have a few largish lumps for textural interest, squeeze some the streusel lightly between your hands and then break the big clumps into smaller bits.
Bake the streusel for 10-15 minutes, stirring once or twice, until golden brown. Transfer the pan to a rack an cool while you make the cake. Keep the oven at 350 degrees F.
For the Cake:
1 1/2 cups sugar
1 cup all-purpose flour
1 tsp baking powder
1 tsp baking soda
1/4 tsp salt
4 large eggs, separated
1/2 vegetable or safflower oil
1/2 cup fresh lemon juice
2 large egg whites
Ice cream or whipped cream, for serving (optional)
Sift together 1 sup of the sugar, the flour, baking powder, and baking soda onto a sheet of parchment or waxed paper; add the salt.
In a large bowl, whisk together the yolks, oil, and lemon juice until blended. Gradually add the dry ingredients to the yolk mixture, whisking all the while; set aside.
Beat the 6 whites in the bowl of a mixer fitted with the whisk attachment, or work with a hand-held mixer. At low speed, beat the whites until thy're foamy and form very soft peaks. Increase the mixer speed to medium -high and gradually add the remaining 1/2 cup sugar, beating until the whites are thick and shiny and hold peaks. (If you run a finger through the whites, it should a leave a smooth, even path.) Fold about one third of the whipped egg whites into the yolk mixture to lighten it, then turn the yolk mixture into the whites and fold it in gently but thoroughly.
Baking the Cake: Pour and scrape half of the batter into the fruit-lined pan. Smooth the top, using an offset spatula, and sprinkle ever the streusel, keeping a little in reserve for decoration the finished cakes. Top with the remainder of the better, smoothing it with the spatula, an place the pan on a jelly-roll pan. Bake in the 350 degree oven for 45-50 minutes, or until golden and a toothpick inserted in the center comes out clean. Remove the cake to a cooking rack and let it cool for at least 25 minutes before inverting onto a cardboard cake round or a serving platter.
Serve the cake with ice cream or lightly sweetened whipped cream if desired and a sprinkle of the remaining streusel.
Storing: The cake is best served just warm or at room temperature the day it is made. However, you can cover the cake and keep i t at room temperature over-night.
Makes 8-10 servings. Contributing baker, Mary Bergin
The cake is just as it's described in Baking with Julia. It's light, buttery and delicious. The streusel and peaches were a perfect pair. I hope you'll try this recipe. Try a new recipe, be fearless and have fun!
Our Dear Julia
Over the past few weeks I've been thinking and referencing the great works of dear Julia Child. Her personality radiates through the pages of her books. At the recent demo day at Bekah Kates, a kitchen store in Baraboo, I used Le Crueset cookware to demonstrate its wonderful uses. The recipe I made was Julia's Boeuf Bourguignon. I made it three times, actually. Once at home before the store opened for tasting during the morning, and another while people shopped. The smell of the deep, rich sauce greeted shoppers as they entered the store. Several times people asked me, "it that "HER" recipe?", or, "did you see the movie?" We all knew who we were talking about. It just wasn't right not to make it just one more time the next day while spending time with friends. Julia would have insisted! As the leaves fall, give it a try!
About a month ago, I had a surprise arrive in the mail. I had pre-ordered a cookbook and it arrived. Not just any cookbook. One of the best I've seem in a long time. Dorie Greenspan, author of Baking With Julia, just wrote another amazing book, Around My French Table. Each recipe is well written and looks delicious. While it's a beautiful book, it will be used and will be marked with the little sauce here, and a drip or two there. Ms. Greenspan has a great blog if you're interested in learning more.
Another piece of Julia news! In late October, ahead of schedule, As Always, Julia: The Letters of Julia Child and Avis DeVoto is being released. I can't wait! It's hard to imagine a book being better then her My Life in France but it will be fun to see.
My most recent Julia moment was on Friday. I made a wedding cake with spice cake and apricot lekvar filling. The lekvar recipe was Julia's from Baking with Julia. It's a delicious apricot paste with almonds and hint of brown sugar. It's similar in consistence to thick applesauce. The color is a deep pumpkin color which makes it a wonderful topping for scones, too.
Here's my recipe: 1 bag dried apricots (about 1 1/2 cups) 1/2 cups slivered almonds 1/4 - 1/3 cup brown sugar 2 tsp. grated lemon or orange zest dash of lemon juice 2/3 cup water
Simmer the apricot, water and zest until the apricots are soft. Combine apricots, brown sugar and almonds in a food processor and mix until smooth. Spread in a pan, and cool, covered with plastic wrap. Enjoy on scones, muffins or even as a cake filling. Will keep 7-10 days in the refrigerated.
Enjoy autumn baking, cooking and entertaining. Until next time, Bon Appetit!
