• Home
    • Classes & Shopping
    • Equipment & Merch Shop
    • Equipment Tips & Suggestions
  • Recipes
  • Blog
  • Cookbook
    • Susan's Paris Notebook
    • Paris Tips
    • Paris Adventures
    • More About Susan
    • Contact
    • Presidential Biographies
    • Paris Restaurants
Menu

The Little French Bakery

P.O. Box 286
North Freedom, WI 53951
6085224981
Peace, Love and Dessert

Your Custom Text Here

The Little French Bakery

  • Home
  • Classes & Shopping
    • Classes & Shopping
    • Equipment & Merch Shop
    • Equipment Tips & Suggestions
  • Recipes
  • Blog
  • Cookbook
  • About
    • Susan's Paris Notebook
    • Paris Tips
    • Paris Adventures
    • More About Susan
    • Contact
    • Presidential Biographies
    • Paris Restaurants

Ice Cream Cone Cupcakes

July 10, 2013 Susan Holding
feature-cupcake.jpg

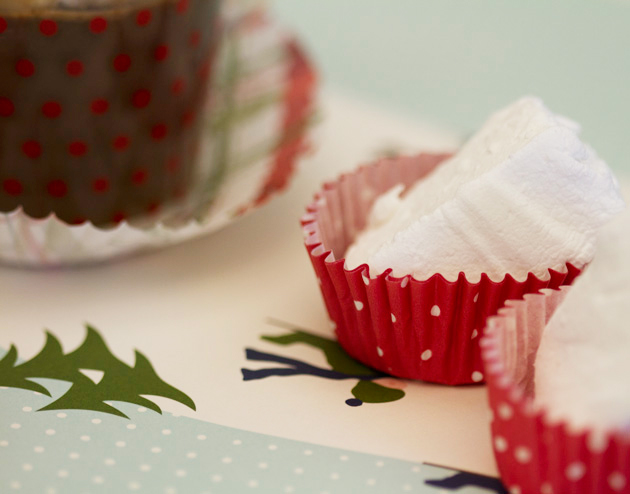
It's just after July 4th, and we're in the full swing of summer.  Our days are hot, long and fun.  I don't know about you, but our grill is barely getting a chance to cool down between uses.   My new favorite cologne is a mixture of sunscreen and bug spray. Our garden flowers are growing by leaps and bounds.  It's such a nice time of year! Over the July 4th holiday, I made some treats perfect for a silly summer day.  Ice cream cone cupcakes.   I don't know where she learned about them, but my mom made these for us for as long as I can remember.  Who knows?  Maybe she invented them!

She'd stand the cones up in an 9 x 13 pan, fill them with batter, bake and frost.

They're the perfect eat-it-all snack.  Kind of goofy, and very easy.

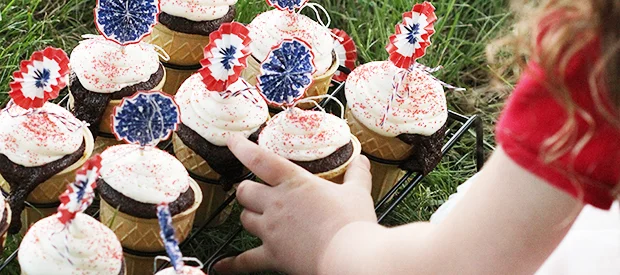
I needed someone to help me with the cupcake display, so I asked for some help from my little friend Maeve.  Her outfit (self-selected) fit the occasion and the spirit of the dessert and holiday.

ice cream cone cupcakes

Things have changed on the ice cream cone cupcake scene.  You can now purchase a stand to support the cones while they're baking in the oven.  No more tipped cones!  The stand is also perfect for transporting your tasty treats.

cupcakes in the grass

For my cupcakes, I used a standard chocolate cake recipe.  Use any recipe you would use for cupcakes.  I filled the cones to just below the top section of the cone.  You really don't want to overfill them, they'll spill over and make a mess.   In fact, set the rack on a baking sheet just in case a cone or two go up and over the cone.

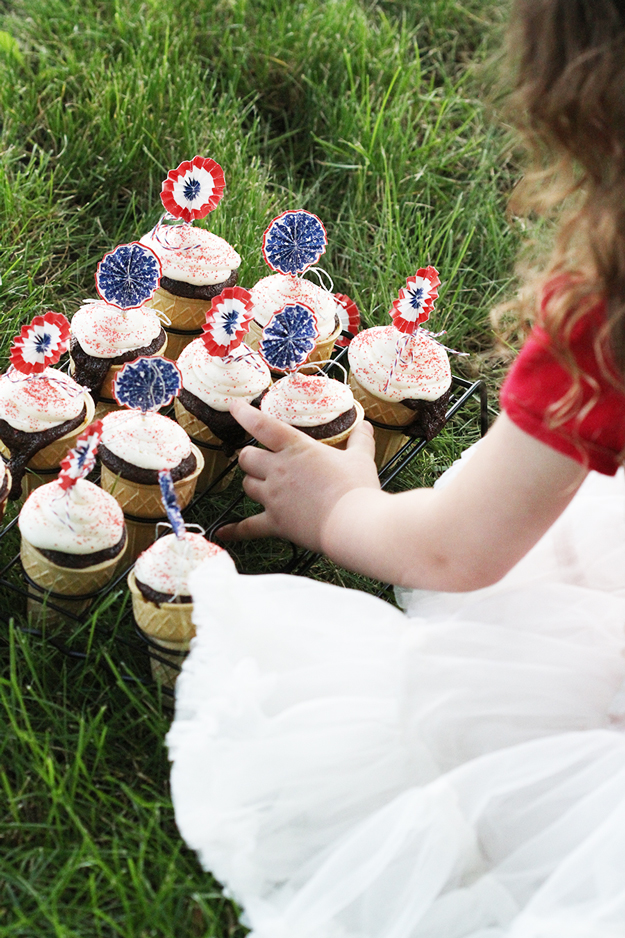
Once the cakes are cool, ice them with your favorite frosting and decorate with a sprinkles.   What could be more fitting to enjoy a cupcake in the grass, than a fluffy skirt, sparkle necklace and stars on your tiara!   I hope you'll make a batch and take them on your next picnic or backyard adventure!

What a treat!
What a treat!

To print this recipe, click HERE

The Little French Bakery's Chocolate Cake Recipe

Ingredients:

Makes about 2 dozen "Ice Cream Cones", or 2 eight-inch round layers

3/4 cup plus 2 Tbsp cocoa

2 eggs

1/2 cup vegetable oil

1 3/4 cup  all-purpose flour

1 cup skim or 2 % milk

1/2 cup warm water

1/2 cup hot brewed coffee

1 1/2 tsp baking powder

1 1/2 tsp baking soda

1 tsp salt

1 Tbsp vanilla extract (real, not imitation)

Directions

Preheat your oven to 350 degrees F.  Be sure the oven rack is centered in the oven.

In the bowl of a stand mixer fitted with the paddle attachment,  or a medium sized mixing bowl, combine dry ingredients.  Whisk to lighten and mix.  Add eggs, oil, milk and vanilla.   Using the stand mixer, a hand mixer beat batter on low to medium speed for 1 minute.  Stop, scape the bowl's sides and bottom be sure all ingredients are well mixed.  Beat for another 30 seconds.    Carefully add the warm water and coffee.   Switch to a spoon or spatula and throughly mix the liquids into the batter.  The batter will be thin in consistency.

Spoon/pour the batter into the cones, do not fill more than half full.   Bake 12-15 minutes, until a toothpick inserted into the cupcake is clean, and the cake springs back to the light touch.  Be careful not to over-bake.


This recipe was adapted from the famous recipe on the Hershey Cocoa can.  It's wonderful for cakes or cupcakes!

In cakes, Susan's List, the little French bakery, The Little French Bakery, the little French bakery Tags ice cream cone cupcakes, kids dessert recipe, little french bakery, summer desserts
2 Comments

Toasted Coconut Marshmallow Bars

July 2, 2013 Susan Holding
bars.jpg
Toasted Coconut Marshmallow Bars

It's the countdown to the holiday weekend.  Summer is in full swing and it's time to find fun, quick and easy treats.

I was in the grocery store today walking down the baking supply aisle as I always do, and an ingredient caught my eye.   Toasted coconut marshmallows.  Stop the cart!  For those of you who can't stand the thought, taste, smell or texture of coconut, you may want to pass on this one.   For those who are still reading, all I can say is... these are delicious!

One bag?  Two bags?  More?  No, I'm wasn't sure what I was going to do with them, and if they were weird I didn't want too many bags hanging around.    Now, what to do with them.   Marshmallows.... s'mores?   Maybe, but too obvious.

Rice Krispie bars?  Curious.  The idea hit.  How about Special K instead of Rice Krispies?  Not a huge change, but interesting.  It fit the requirements.   Fun, easy and as goofy as the marshmallows.

toasted coconut marshmallow

The recipe is the same as making Rice Krispie Treats.  Melt the butter, add the Marshmallows.  Add the cereal, mix and press into a buttered or oiled pan.  I was a bit worried about the coconut scorching or burning.  No problem.  Just keep the heat at low/medium and you'll have no problem.

melted marshmallows
melted marshmallows

I spread the mixture into an eight inch cake pan, then drizzled with melted chocolate chips.  The perfect combination in my book.  Chocolate and Coconut.

To print this recipe, click HERE

Toasted Coconut Marshmallow Bars

1 bag Toasted Coconut Marshmallows (about 30)

3 cups Rice Krispies or Special K Cereal

2 1/2 Tbsp Butter or Margarine

1/3 cup chocolate chips, melted

Directions

In a large saucepan, melt the butter/margarine.  It's ok if it browns just a little.

Add marshmallows, stir to melt.

Add the cereal.  Stir to mix, crushing the cereal a bit as you stir.

Spread in a buttered baking pan or small, flat dish with sides.

Drizzle with melted chocolate chips if desired.  Cool, cut, and serve!


Toasted Coconut Marshmallow Bars

I hope you have a Happy July 4th!  Wave a flag, thank a fireman, be safe and be kind.

In dessert, Susan's List, the little French bakery, The Little French Bakery, the little French bakery Tags little french bakery, marshmallow recipe, rice kris pies, special K, toasted coconut marshmallows
Comment

Bonjour!

June 11, 2013 Susan Holding
emma.jpg

What a month this has been!   There's so much to tell you. First, I'll tell you the really big news.    Early this Spring, I presented a book proposal to a publisher who loved it!   We've signed the contract so in 2014 I'll have a cookbook.  The book will have the recipes I teach here at The Little French Bakery with many others.  I'll be doing the photography and adding stories with the recipes.    As the writing and editing progresses, I'll keep you posted with details of the book's release.   It's incredibly exciting.   It will be published by Skyhorse Publishing, New York.

What else?  Recently, we were in France, on a barge with friends cruising on the Canal du Midi.  Our barge was named Emma.  The hosts, crew and views were wonderful.   I'll be writing more on the barge life in a future post.   I had every intention of blogging on our trip but due to technical difficulties, (a brain cramp on my part) I couldn't get to my blog to write using my Ipad.   I debated about bringing my laptop and didn't.   Big mistake.  I've missed writing, but I have so much to show and tell.    Our trip also included a weekend in Bruge, Belgium and several days in Paris before and after the barge trip.   We had time to walk the streets and take it all in.    There are so many great places I've wanted to tell you about, and now I have photos to help.

Here are just a few of my favorite sights from Paris.   My postcard to you.

Cafes.  I love the chairs, tables, place settings, and ambiance.  The streets were lined with tables filled with Parisians and tourists soaking up the sunshine.

A Fromagerie.   Cheese as far as you can see.   The smells are incredible (as long as you like cheese!)    We had just come off the barge where we enjoyed many great cheeses.   It was a treat to look in the case and recognize some of the names of cheeses that were new to us.  A new favorite, Mimolette.    Bright orange, sharp and crumbly.  It looks like of like a cantaloupe.  It's in some cheese shops.  I highly suggest picking up a small piece. to try.   I can't write about cheese without mentioning Morbier.   A beautiful  semi-soft cheese with an ash layer separating and layers of  cheese.

And of course, the Tour Eiffel.   When we checked into the hotel for part deux, the receptionist  at the Madeleine Hotel asked if we would like to be on the floor that views the Eiffel Tour.    She didn't have to ask twice.  The third frame is the view out our window at dusk.   When we got back to our room after dinner, I sat on the edge of the bed with my camera for a least an hour watching the color of the sky change and took too many photos of this view- if that's possible.  I woke up in the middle of the night and looked back out again for a few minutes.   It's a view that I never tire of.  Gorgeous.

Favorite sights in Paris

And who can get tired of seeing and tasting macarons?  Not me!   Our friend stopped by a patisserie and picked an an assortment for the train ride.  Here they are.  So pretty and so delicious.  Did you know that only the middle of a macaron has the flavor?  The color is just for suggestion (except for the chocolate ones).  These were especially colorful.

macarons.jpg
macarons

One of the highlights of our time in Paris was a meal at Benoit, an Alain Ducasse restaurant.   We went to lunch and had great cassoulet, a delicious bean and meat stew.  It's the best I've ever had.  Okay, I say that every time we go there.   After the meal, as we were having coffee, our waiter stopped by with the tray of just-out-of-the-oven Madeleines.   They were perfect.   It was so fun taking them from the pan tray rather than having them served on a plate.  It was like sneaking them from the kitchen before they were ready to be served.   Here's my quick snap shot.

madeleines
madeleines

Now you can make Madeleines too.   I like them left out overnight so they're crunchy.  Others like them soft, right from the oven.   I think the second bite is always the best.    If you need a mold, check with a local kitchen shop.  Most stock them.  Just ask for a Madeleine pan.

To print this recipe, click HERE

Madeleines

  1. 200 g melted butter   (14 Tbsp)  (cool and allow solids to settle )
  2. 4 eggs
  3. 170 gm granulated sugar  (3/4 cup plus 2 Tbsp)
  4. 1 pinch salt
  5. 10 gm honey  (1 Tbsp)
  6. 5 gm baking powder  (1 tsp)
  7. 180 gm flour  (1 3/4 cups plus 1 Tbsp.)

Melt butter and cool.

Sift flour with baking powder.  Mix sugar and eggs to near ribbon stage.  Add vanilla, lemon/orange zest.  Add flour.  Fold into egg/sugar mixture.  Add honey.  Add butter, leaving milk solids in container.  After mixing, place in refrigerator to cool slightly/stiffen.  Butter molds well, then flour.  Place molds in refrigerator to firm butter if necessary.  Use a pastry bag if needed to fill molds about 2/3 full in an oval top to bottom in the center of the mold.  Bake at 350 for about 6 minutes or until puffed and golden.  Immediately tap/rap on counter to knock madeleines out of pans and cool on wire rack.   1 recipe fills 2 molds.


If you're heading to Paris, be sure to check out my Paris Notebook.   There are suggestions on places to go, eat and help with shopping for cooking equipment and more.   I'll be adding more info and photos our most recent adventures.

Be kind, and enjoy!

In cake, cookies, soups, spring meals, tart, the little French bakery, The Little French Bakery, the little French bakery Tags benoit, Eiffel tower, macarons, madeleine recipe, paris, The Little French Bakery, visiting paris
13 Comments

Crepes (With and Without Gluten)

May 16, 2013 Susan Holding
plates.jpg

Let’s celebrate the French February 2nd holiday - La Chandeleur

Read more
In favs, Susan's List, the little French bakery, The Little French Bakery, the little French bakery Tags crepe recipe, cup4cup, gluten free, lena kwak, paris crepe recipe, The Little French Bakery, thomas keller
12 Comments

Hazelnut Maple Cookies (Wheat free!)

May 1, 2013 Susan Holding
Spring
Spring

Here in Wisconsin it's been a long, cool spring.   This week we've started to signs of Spring.  My hens & chicks are popping out of the antique typewriter, the daffodils are blooming, and the strawberry plants are peeking through the soil.

Long before the plants were popping there was another sign of Spring.  Maple syrup season.  Wisconsin is on the edge of the maple syrup belt.   Like coffee and chocolate is to the equator, there are few places on earth that support this product's production.  The temperature must be above freezing in the day, and down to about 20 F at night.  Sap runs into buckets or through hoses to be boiled into the liquid gold.

The land we live on was once a maple syrup farm.   When we walk through the woods, we see tubing and pans from years and years ago.  So far, we haven't tapped any trees, but someday we'll give it a try.   Did you know that it takes gallons and gallons of sap to make just one pint of syrup?    I was lucky to get to watch a sap cooking session this year - with a taste of the sap.  It's much lightly sweetened water, almost like a fresh coconut water.

Now, on to the recipe!  I promise there's a connection here.

Back in January, I went to a class in Brooklyn for a class.  After class I met up my niece and her beau, they told me about "the best bakery in Brooklyn".    Ovenly.   They told me all about the gluten free items and raved about  the cookies.    I was hoping to get there during my stay but it didn't work out.  Instead, I contacted the bakery when I got home to ask about their cookies.    Would they share a recipe?  You bet!  And, it's a perfect recipe for spring.   Delicious nuts, and sweet maple syrup.

It wasn't until about half way through the preparation that I realized these are gluten free.   The cookies are amazing.  A perfect tea time afternoon pick-me-up, or great for travel.

I didn't have any hazelnut flour on hand (who does?), so I ground the nuts in the food processor.   I was about 2/3 cups short, so I made up the difference with almonds.

nuts in proc2
nuts in proc2

The nuts are blended with the egg white, zest, sugar and touch of syrup.  Rolled into ping-ping sized balls, then rolled in the maple sugar and topped with a hazelnut half.  Easy and fast.    Here the the cookies ready for the oven.  I would suggest pushing the nuts into the cookies just a little more.  They look nicer that way.

prebaked hazelnut cookies

After 12 minutes, and the best smell from the oven, the cookies are finishes.  The maple sugar melts and creates and a crisp crust, with the nutty inside, perfectly baked.    Wish you could smell them!  The orange zest is a great addition, be sure not to leave it out.

hazelnut maple cookies

Thank you to Erin and Agatha for sharing this great recipe, and Lauren for the tip.  When you're in Brooklyn, stop by and see them.  Their flagship shop is at 31 Greenpoint Ave., Brooklyn.

I hope you enjoy the cookies as much as I did!

Happy Spring!

To print this recipe, click HERE

Hazelnut Maple Cookies

Ovenly Bakery - Brooklyn

Ingredients:

4  1/3 cups hazelnuts

1 cup sugar

1 tablespoon maple syrup

zest of 1/2 orange

3 egg whites

Maple sugar for coating cookies

hazelnut halves for garnishing cookies

Instructions:

Preheat oven to 350 degrees F.  Line a baking sheet with parchment paper and set aside.

In a food processor, pulse the hazelnuts until they form a coarse meal; the pieces should not be larger than about 1/8 inch in diameter. Transfer the ground nuts to a bowl. Add the sugar, syrup,egg whites and zest. Using a rubber spatula, mix the ingredients together until well combined. Cover the dough with plastic wrap and let sit until slightly dry to the touch, about 10 minutes.

Using your hands or a small scoop, form or roll the dough into 1-ounce balls. Coat in maple sugar and top with a half a hazelnut by pressing it into the dough. Place on the prepared baking sheet and bake for 12 minutes, turning at 6 minutes. Let cool completely


Hazelnut Maple Cookie
In cookies, Susan's List, the little French bakery, The Little French Bakery, the little French bakery Tags brooklyn bakery, cookie recipe, gluten free cookies, hazelnuts, little french bakery, maple sugar, maple syrup recipe, ovenly bakery
3 Comments

Gougères with Salami and Antipasto Salad

March 26, 2013 Susan Holding
Antipasto-Salad-feature.jpg

Salami, Salami, Bologna!   Anyone remember the Popeye Cartoon?  As I worked on these recipes the phrase kept running through my mind.  I finally did an internet search and uncovered the source.   If you're in the mood for some nostalgia you can view the episode via this link.  https://www.youtube.com/watch?v=kgvDcXN3pJo. A group of bloggers were invited by Bolzano Artisan Meats in Milwaukee, Wisconsin to choose a Bolzano Salami then create a few recipes.  I choose Old School.  A hard salami made with pork, garlic and lots of crushed black pepper.   The company makes delicious meats using hormone free products in small batches.  I was thrilled with my choice.

Salami and Gruyere Gougeres

Salami and Gruyere Gougeres

The first recipe uses classic Pate a Choux with gruyere cheese and small slices of the salami.  After they baked, I sliced them, and filled them with stone ground mustard, another slice of salami and cheese.  Oh boy!  The perfect  party snack.

Salami and Gruyere Cheese 

Gougères

125 gm water (about 1/2 cup)

1/2 tsp salt

3 1/2 T butter

2 tsp. sugar

75 gm flour (2/3 cup)

2 eggs, plus 1 egg for egg wash

1 cup grated gruyere cheese, or cheese of your choice

3/4 cup thinly sliced, then chopped Bolzano Old School Salami

Preheat your oven to 375 degrees F.

In a small saucepan, place the water, butter, sugar and salt.  Bring to a simmer until butter melts.  Add the flour all at once, and stir.  The mixture will look like mashed potatoes.   Place the flour mixture in a mixing bowl, and add 2 eggs one at a time.  Stirring well after each egg.  Stir until the mixture is smooth and glossy.  Add the cheese, reserving a small amount (2-3 T), and the salami.

Using a tablespoon or pastry bag with large tip, pipe or spoon ping pong to gold ball sized balls of dough on to a parchment lined baking sheet.  Place the last egg in a small dish and whisk with a fork to loosen.  Using a pastry brush, gently brush the top of the balls with egg.  Be careful not to drip egg on to the parchment paper from the pastry as it will keep the pastry from puffing as well as it can.  Sprinkle the tops of the puffs with extra grated cheese.

Bake for 20-30 minutes or until completely golden brown. Cool on a wire rack and serve with mustard, pickles and more sliced salami and cheese.  Puffs can also be sliced across and filled for tiny sandwiches.

Makes about 18 small puffs


 My next recipe is Antipasto Pasta Salad.   This recipes screams of summer picnics.   It's far from summer where I am, but it really put me in the mood.  The big chunks of smoked cheese, sun-dried tomatoes and the salami really take this over the top.  Wait until you smell it.   The aroma is amazing.  Find a pasta with lots of curves to trap the flavorful dressing.

Antipasto-Salad

Antipasto-Salad

Pasta Salad Ingredients

Pasta Salad Ingredients

Antipasto Pasta Salad with Salami

1 pound rotini or fusilli or any (corkscrew-shaped pastas) 2 garlic cloves 1 tablespoon Dijon-style mustard 1/3 cup red-wine vinegar 2 tablespoons balsamic vinegar 1 tablespoon water 1/2 cup vegetable oil 1 ounce (1/2 cup) sun-dried tomatoes 1/2 pound smoked gouda, cut into 1/2-inch cubes 1  1 pound can garbanzo beans, drained and rinsed

1 small can artichoke hearts, cut in half (smaller bites)

1-2 T capers 3 1/2 ounces sliced hard salami, cut into julienne strips 10 to 20 bottled small peperoncini (pickled Tuscan peppers)

1 cup cherry tomatoes cut in half 1/2 teaspoon dried hot red pepper flakes 1 cup loosely packed fresh flat-leafed parsley leaves, minced

Start boiling salted water in a large pan. Cook the rotini until it is tender and drain it. Refresh the pasta under cold water and drain it well.  Using a food processor or blender, blend the garlic, the mustard, the vinegars, the water, the oil, and salt to taste until the dressing is emulsified. In a very large bowl toss the pasta well with the dressing and stir in the sun-dried tomatoes, the mozzarella, the garbanzos, the salami, the Tuscan peppers, the red pepper flakes, and capers and the parsley and tomatoes for garnish. Chill the salad, covered, for 1 hour. The salad may be made 2 days in advance and kept covered and chilled.Serves 8-10

pasta-close

pasta-close

Bolzano Salamis are available online and at various outlets.  To find more recipes and read more about the project, you can find the other bloggers at these sites.  Lori Fredrich of Burp was the curator of the project. Check them out!

Participating Bloggers:

Rebecca from CakeWalk: 

rcakewalk.blogspot.com

Molly from Peanut Butter & Pickles:  

www.pbpickles.com

Melanie from From Fast Food to Fresh Food:  

www.fastfood2freshfood.com

Anna from Tallgrass Kitchen:  

www.tallgrasskitchen.com/

Lori and Paul from Burp! : 

www.eatatburp.com

In baking, favs, other, Sides, the little French bakery, The Little French Bakery, the little French bakery
1 Comment

Mocha Chocolate Chunk Cookies

March 20, 2013 Susan Holding
featured-cookies.jpg

Mocha Chocolate Cookies  

Every now and then a recipe comes along out of the blue that sweeps me off my feet.  I was in the bakery catching up some Tuesdays with Dorie recipes when POW theses cookies came along.   Soft, crunchy, chewy, chocolaty, a hint of coffee... I love them.

Mocha Chcolate Chunk Cookies by Susan Holding

For those of you who are new to my blog, I'm part of the group of bloggers who are baking our way through the book Baking with Julia, by Dorie Greenspan.   Twice a month we make a recipe and blog about it, linking to the big site Tuesdays With Dorie.   We get to make recipes we may not have otherwise tried, and some that we've made lots of times.   You'll always have link to the host for the week who provides the recipe.   You might even peek ahead and bake along with us.   You're always welcome to join me and comment on your baking successes...or challenges.

The recipe calls for dried apricots.  I usually have some around, but not today.  As I looked through the cupboard, I found a big bag of dried plums - better known as prunes.  They were soft, and plump and with the dark color, perfect for the cookies.

Ingredients by Susan Holding

Another wonderful attribute to the recipe is that it calls for chocolate which is chopped rather than chips.  I used chopped dark chocolate 58%.  Some big chunks, dust, and little pieces.   I prefer chocolate chopped rather than chips in most cookies.

The recipe assembles easily.  Cream the butter and sugars, add the eggs, stir in the dry ingredients, then the chopped prunes and chocolate.  My dough was still very cool after it was mixed so I didn't chill it as the recipe suggested.  The cookies baked to a great color in 12 minutes, just as directed.

cookies ready for the oven by Susan Holding

There's no need to squish or smoosh the cookies.  The balls of dough are about the size of ping pong balls.

Make these cookies!

The fruit disappears into the dough and adds a texture and sweetness which compliments the coffee and chocolate.  As we wait for the arrival of spring and temperature to warm, these will warm your heart.   Enjoy!

You can find the recipe at Galettista by our host Peggy.


In cookies, the little French bakery, The Little French Bakery, the little French bakery Tags cookie recipe, dorie greenspan, julia child, mocha chocolate chunk cookie, The Little French Bakery, tuesdays with Dorie
12 Comments

Macaroni Pie & Rum Punch - Classic Barbados Cuisine

March 12, 2013 Susan Holding
fish-art.jpg
snow-and-sun
snow-and-sun

What a difference a day makes! In just three times zones, well two with day light savings time in effect, we made our way from 14 degrees F and snow to 80 degrees and sunny. It's incredibly beautiful here. The people are warm, helpful, and great cooks. We're loving West Indian cuisine. The rich flavors and spices are steeped in tradition.

Caribbean View
Caribbean View

Before I tell you all about the food and in particular, Macaroni Pie, I have to share at least one rum punch photo with you. This one was taken at Brown Sugar, a very traditional Bajan (that's what people from Barbados call themselves) restaurant.  Here's some trivia for you.   Punch is derived from the word Panch which means 5.  There are five ingredients in Rum Punch; Sweet, Sour, Strong, Weak and Spice.

Rum Punch
Rum Punch

The poem to remember the recipe is...

One of sour, Two of Sweet, Three of Strong and Four of Weak.  A Dash of Bitter and a Sprinkle of Spice served well chilled with plenty of ice.

To print this recipe, click HERE

Barbadian (Bajan) Rum Punch

1 measure lime juice

2 measures simple sugar syrup

3 measures Dark Caribbean Rum

4  measures water ( or good quality fruit juice. Passion fruit is really good)

Dash of Bitters (Angostura) and some grated nutmeg

Mix together and pour over ice!

Adapted from Totally Barbados.com


A typical Bajan meal is fried, grilled or blackened fish, macaroni pie or beans & peas, salad, and vegetables.   Pass the Bajan hot sauce and you're all set.   Root vegetables are really big, so I'm happy as can be.   I have to tell you,  I'm obsessed with macaroni pie.  Not so much for for its taste or good looks, but for its wonderful tradition in the culture.   Pie, as they call it, is everywhere, and is a staple in every household.

Rose, a delightful sweet woman,  is one of the maids at inn we're staying at.  She's a grandma and knows her way around the kitchen.  I asked her about her macaroni pie.   She told me that no one really has a recipe, "they just make it, darlin".   The manager of the hotel as well as the concierge joined the conversation.  Each referring to an older family member who had passed down their recipe.   "My mom adds mayonnaise", one said.  "No mayo in ours, but we grate the onion and sweet pepper add just a bit of Bajan sauce for heat.", another added.    Some make it one the cooktop before putting it in the oven.  Others stir it together after the macaroni is cooked but only bake it.   I loved every second of the debate.

mac-pie-and-flying-fish

Here's the meal at Brown Sugar.   A piece of fried Flying Fish, macaroni pie and salad.   The white sauce is a very smooth tartar sauce with Bajan sauce drizzled over the top for heat.   The color is from Scotch Bonnet peppers.   Bring on the heat!

To print this recipe, click HERE

Macaroni Pie

8 oz (1/2 pound) macaroni (the long tubes broken in 1/3 sections are most authentic

1 T butter or margarine

12 oz cheddar cheese, grated

1 egg

1 cup milk

2 tsp onion powder or 1-2 T grated onion

1 tsp hot English dry mustard

1 tsp white pepper

1 tsp salt

1/2 tsp red pepper sauce (optional)

2-3 T tomato catsup (optional)

For the garnish:

2 T breadcrumbs

2 tsp butter

2 T grated cheddar cheese

Preheat oven to 350 degrees F.  Cook the macaroni in salted boiling water until tender, but not overcooked.  Drain the macaroni and place in back in the hot pan. Mix in the butter.  Add the cheese a little bit at a time.  Whisk the egg in the milk then add to the mixture.  Add the spices.  Combine well and pour into an oven proof baking dish.  Top with the butter, grated cheese and breadcrumbs.  Bake 30-45 minutes until golden.  The baking time will depend on the depth of the baking pan.

Adapted from Totally Barbados.com


So now that you've met macaroni pie & company, I'd like to tell you about the Oistins Market.  Oistins is located at the South end of the island.  It's a quiet end of the island with beautiful beaches and many more locals than tourists.  As we walk past the post office and wooden shack (the bus terminal), we're greeted by a group of men sitting on buckets playing dominoes on the top of the steel oil drum.  The banging sound and the laughter are heart warming as we pass.  They look up with gentle smiles and always greet us hello.

Dominoes in Barbados

Our  part of the island is Oistins, a fishing community.  When the boats arrive back to shore with the fish,  the fish go straight to the market.   Next to the market is are several stands. My guess is about 30.   Each one is about 10' square.  Names like Roslin & Sons, Janet's, Uncle George's and Pats are painted on the wooden boards.   Picnic tables line the streets and tiny alleys with a huge stage in the center of the market for music and dancing.   A few stands are open daily.  But, on Friday nights everyone goes to Oistins.  Locals and tourists.  Grab a Banks beer, find a seat and prepare yourself for the freshest fish around.   Huge lights in the shape of fish hang over the main street.

Oistins Barbados
Oistins Barbados

A chalkboard lists the fish for the day.   We choose Uncle George's Fish Net this week.   The stand is busy and lively.  Reggae music plays loudly is the background, and the party had begun!

Uncle George's Fish Net Menu
woman-at-fish-market

 The food is hot, fresh, not too fancy and always delicious.  My meal was mahi mahi with rice & peas with salad.

Oistin Fish Dinner
Oistin Fish Dinner

If you're traveling to Barbados and looking for some tips on where to stay and suggestions for restaurants here are my favorites.

Little Arches Hotel - At the  South end of the Island.  A small cozy and lovely hotel.

Naru, a great  Asian Fusion restaurant and on the water

Nishi, another terrific  Asian Fusion (can you tell we love seafood and sushi?)

Tapas, on the water and wonderful food, small plates or entree portions

And of course,  Oistins Fish Market

Travel safe, be safe and be kind.

In drinks, Sides, the little French bakery, The Little French Bakery, the little French bakery Tags bajan recipes, Barbados, little arches, little french bakery, macaroni pie, naru, nishi, rum punch, tapas, rum punch recipe
12 Comments

Cheating on Winter Pea Soup - French Fridays with Dorie

February 22, 2013 Susan Holding
featured.jpg
Pea Soup
Pea Soup

Today's from Around My French Table by Dorie Greenspan  is quick, very easy, and surprisingly delicious.

It's hard to cheat on winter right now.  It's very present.  Will it snow?  Not snow?  Did we get missed by the storm?   It's pleasantly snowing with no sign of Spring.   Except for this sweet pea soup.  I used frozen baby peas which are my favorite.

I'm guessing that right now most of you could make this soup without a trip to the grocery.

  • Frozen peas .  Check
  • An onion.   Check.
  • 2 Tablespoons (or so) butter
  • A can/box or frozen chicken stock.  Check.
  • A few leaves of lettuce.  Check
  • Salt and Pepper.   Ready to go!

And best of all.  Do you have 15 minutes?  Yes,  I said 15 minutes.

Just sauté the chopped onion in the butter, add the vegetables and seasoning.  Now simmer for 10 minutes.  I have you 5 minutes to gather the ingredients and chop the onion.   After simmering, puree in your food processor or blender (being very, very careful).  That's it!  You have a lovely, sweet, bright soup.   And because it's pureed, it always feels a extra fancy.

Rain Coast Crackers
Rain Coast Crackers

Did you see the pretty crackers on the side of the bowl?  I'd  like to introduce you to Rain Coast crackers.  They're from Leslie Stowe Foods, made in Canada.  These are Salty Date and Almond.  I love them with soft cheeses.  Alone, they were perfect with the soup.   These are gluten-free if that's important in your diet.

soup
soup

Here are the details adapted from Bon Appetit

To print this recipe, click HERE

Cheating on Winter Pea Soup

Ingredients

  • 2 teaspoons butter
  • 1/2 cup coarsely chopped onion
  • 3 cups (or more) low-salt chicken broth or vegetable broth
  • 8 ounces sweet baby or frozen peas (do not thaw)
  • 4 cups  sliced romaine lettuce (1/2 of medium head), or 1 heart of Romaine
  • Crème fraîche or sour cream, for garnish if desired
  • Crumbled cooked bacon

Melt butter in large saucepan and sauté onion until soft.  Add broth and bring to boil.  Stir in peas and lettuce.   Reduce heat and simmer uncovered for 10 minutes.   Puree soup in blender until smooth, working in batches.  Reheat soup by returning to saucepan, and thin soup with extra broth if necessary.  Garnish with creme fraiche and crumbled bacon if desired.  Makes about 4 servings.

Have a good weekend.   Be safe, and be kind.

In soups, the little French bakery, The Little French Bakery, the little French bakery Tags around my french table, pea soup, soup recipes, spring soups, The Little French Bakery
14 Comments

Brandy Old-Fashioned

February 18, 2013 Susan Holding
brandy-old-fashioned-feature.jpg

A Wisconsin tradition.  Here's how to make this this classic cocktail.

Read more
In drinks, Susan's List, the little French bakery, The Little French Bakery, the little French bakery Tags Brandy, brandy old-fashioned, cocktail recipe, The Little French Bakery
3 Comments

Valentine Cookie Swap

February 14, 2013 Susan Holding
choc-chip-feature.jpg

Happy Valentines's Day!  I love Valentine's Day.   I've always loved it.   From elementary school shoe boxes filled with sweet notes from classmates, to a Valentine  Card and little present on the kitchen counter from Gary, I love it.    One of my favorite memories was walking into our kitchen for supper when I was about 8 on Valentine's Day.  My mom had hung lime green polka dot patent leather tote bags on the backs of our chairs.  The bag  had a sleeve on the outside that held a matching umbrella.   So sweet.  And so Doris Day! Another reason I love Valentine's Day?  It's Eddie, my dog's birthday.  Yes, we talked about naming him Romeo, Valentine, and many other more romantic names, but he was and always will be, Eddie.  Here's the birthday boy.  He's 1/2 German Shorthair and 1/2 Blue Heeler.  And quite a guy.  Today he's seven, and acts like two.

eddie
eddie

Our French Friday's with Dorie group decided to have a cookie swap to celebrate the day.   The swap was organized by Alice.  (Thanks, Alice!)    We each got the name of the Valentine, and made them a dozen cookies.  The box also included a recipe, and a little present.

My box arrived, and was so fun to open!   Susan Lester had my name.  Inside the big box was TWO boxes of delicious cookies, a pretty ceramic heart, complete with rose petals, and a tres jolie Valentine.  Thanks, Susan!   Her blog is CreateAmazingMeals.com    She knew just the right theme.   An Eiffel Tower and I'm in!

CookieSwap Box
CookieSwap Box

The cookies are fantastic!  Chewing, very flavorful and perfect for an evening snack.  Ok, I ate two right away and am tempted to have another very soon!

Here's the recipe from Susan:

To print this recipe, click HERE

Inspired by Marcel Desaulniers “Mrs. D’s Chocolate Chip Cookies” from Death by Chocolate Cookies.

Preheat oven to 300 degrees F.

In a stand mixer, at medium speed, for 4 minutes, cream

½ pound Butter, softened

2 cups Dark Brown Sugar

When light and fluffy, scrape down the sides of the bowl and blend in:

2 teaspoons Vanilla Extract

1 Tablespoon Dark Rum (we use Myer’s)

2 Eggs

When thoroughly blended, add:

4 cups All-purpose Flour (we use King Arthur)

½ teaspoon Salt

1 ½ teaspoon Baking Soda

Start on low speed, slowly increasing to medium-high.

When dry ingredients are completely mixed in, add:

2 cups Semi-sweet Chocolate Chips (we use Ghirardelli)

1 cup Walnut pieces

1 cup Pecan pieces

Drop cookie dough onto parchment paper-lined baking sheets (about 1 ½ Tablespoons).

Bake for 25 – 30 minutes, according to your preference.

Recipe from:  www.createamazingmeals.com


chocolate chip cookies

I hope you'll make these and visit Susan's site for more recipes and ideas.   Happy Valentine's Day!   Be kind.

In cookies, Dorie Greenspan, french fridays with Dorie, Susan's List, the little French bakery, the little French bakery Tags chocolate chip cookies, french fridays with dorie, The Little French Bakery
10 Comments

Caramelized Onion Dip aka French Onion Dip

January 30, 2013 Susan Holding

Love Chips + Dip? Here's a dip that will amaze your friends.

Read more
In favs, Susan's List, the little French bakery, The Little French Bakery, the little French bakery Tags french onion dip, little french bakery, onion dip, superbowl recipes
6 Comments

Pastry Creme (Crème Pâtissière)

January 16, 2013 Susan Holding
feature-pastry-cream.jpg
Pastry Cream in Puff Pastry

As I prepare to leave for Paris it seems like the perfect time to tell this story.   It's always fun remembering my days at Le Cordon Bleu.  I hope you'll enjoy.

The March to the Poubelle

Our Basic Pastry Course was in the intensive format meaning that we took 3-4 classes each day instead of 1.  It condensed 12-14 weeks of curriculum to just three.  It truly was intense.   We would be in the lecture room then immediately run downstairs to the kitchen to prepare at least one or all of the recipes the chef had just demonstrated, then back to the classroom.   The days started at 8:00 am, and went until 8:00 pm.  Some days included a free time block to run an errand, or in our case to do a little shopping and or eating.  Both activities were highly encouraged.  After all, how were we to learn what great pastries looked and tasted like?

The chefs in the school worked a French workweek (35 hours), so we had to have a combination of chefs to cover our long days.  Our main chef instructor was off for the evening and bid us farewell.   Another chef, who happened to be a Cuisine program chef, was going to oversee our kitchen preparations.  All the chefs were very distinguished and impeccably  neat.   Our new babysitter chef was even more so.  He exuded an air of confidence and importance that had us more nervous than usual.  Add to this the fact that cuisine chefs have little time for pastry chefs, (too much weighing and measuring) let alone pastry students in their first course.

It was early in the course, and we had seen pastry cream prepared, and made it ...once.  The chef suggested that we divide the  main recipe and each make a component as if we were working together in a restaurant.   One or two people would make a sponge cake, another the mousse, and another the crème pâtissière.  This sounded very reasonable.  We divided the duties between our small group, increasing the amounts so each of us would have the perfect amount for our dessert.

We carefully completed our mise en place (gathered our ingredients) and went to work.  Our Chef walked about the room watching us, and helping with any questions and offering help with locations of ingredients.  We had the feeling there were about a million other places he'd rather be, and he had more or less drawn the short straw to teach late that night.   Every time he passed by my work station, I got a whiff of his amazing cologne and a stern glance that made me even more nervous.  My French was caveman at best, so as he'd pass by, I'd muster a "bonjour Chef" and offer a nice Wisconsin smile.   He smiled back, but looked like he had just tasted something sour.

My contribution to our group was the pastry cream.  We needed 4 times the recipe for 4 students so I had to separate 16 eggs.  It went fine.  No broken yolks, and no spills.  I gathered the milk, sugar, flour, cornstarch and eggs had headed over to the stove.   I combined the ingredients in the order and technique from what my notes and memory offered.  So I thought.   I stood at the cooktop stirring and stirring, smiling away at the Chef as he approached.    He stood beside me, and watched me stir.   I had nothing to contribute to a conversation so I kept stirring and nervously smiling.  Finally, he broke the silence with "Qu'est que sais?"  I 'm sure I looked at him with a blank, panicked stare.  "Qu'est-ce que tu fais?" (what are you making?), he asked.    I thought to myself, what is wrong with him?  Surely he's seen someone make pastry cream before.   "Crème pâtissière, Chef", I said.  Hoping that he'd move on.  But no.

Then came the moment.  The belly flop in front of your swimming class moment.  In one motion, he flicked his head to the up and to the side, made THE tisk sound, and picked up my saucepan.   "Suivez-moi", he said.   I looked behind me where my classmates stood paralyzed watching and hoping one could translate.  "He wants you to follow him", one piped up.   So off we went from one end of the kitchen to the other.  It felt like the distance of a football field, but it was really about 50 feet.  I was about three steps behind, wondering where could we be going?    We arrived at our destination, a gleaming stand holding a perfectly attached garbage bag.  Why couldn't we just use the garbage can at our end of the room?  He stepped on the foot pedal with his gorgeous French, perhaps Italian shoes and up went the lid.   He stretched out his arms, and lifted the pan over his head and slowly dumped the gooey, wall paper paste mess from the pan into the garbage.   My pastry cream was poubelle.  Garbage.

"Répéter", he said as he put the pan in a nearby sink.   I made the walk of shame back to my workstation.  My friends were pale, very sympathetic and trying not to make eye contact.  They had busied themselves with things to do that required crouching behind the workstation on the other side.  I willed myself not cry.  After all, he didn't yell and scream.  But now what?  I had no idea what I had done to cause the problem.

"Je vais vous aider à faire de la crème pâtissière", he said.  I will help you make pastry cream.   I gathered a new set on ingredients.  He stood beside the entire time.   Part of me wanted to crawl in a hole, and the part felt like I had a pro at my side who wasn't going to let me screw this up again.

We went to the stove together.   I don't know what I did  wrong the first time and never will.  The second time required very little time at the stove. "Aller vite", go fast he said motioning with his arms so I knew just how fast to go.  Our pastry cream was perfect.   He held the plastic wrap lined pan as I plopped the rich, dreamy vanilla custard in to the pan.   "Vous avez fait un bon travail ce moment", You did a good job that time.  No hugs and back slaps, but a slight warmth in his eyes to let me know it was okay.

To this day, I think of him every time I make pastry cream.    It's not good, it's great, and I have him to thank.  Merci beaucoup, Chef.

I can't stand beside you, but I'll walk you through the steps of making crème pâtissière.  Perfect pastry cream.

The ingredients are simple.  Milk, sugar, flour, cornstarch and vanilla.  I don't add other flavorings or steep fancy ingredients into the milk.   I like to keep it pure and simple.  If you don't have a vanilla bean, you can add vanilla extract at the end.

pastry cream ingredients
vanilla bean
vanilla bean

Hold the vanilla bean with one hand, and with the other slice the bean open.   Using the back side of the paring knife, gently slide down the length of the bean gathering the tiny vanilla seeds/paste.  Put all the seeds and the pod into a saucepan with the milk and 1/2 of the sugar.  Stir briefly, then bring to milk to a simmer over medium heat.

Now, in a bowl, whisk the egg yolks.  Now while whisking the yolks, add the sugar.  Keep whisking.  There's a chemical reaction of heat that occurs when yolks meet sugar.   This cooks the yolks, and can make microscopic scrambled eggs in the cream making the texture less than perfect.  Once you have the eggs and sugar mixed, add the flour and cornstarch and mix well.  The mixture will be thick.

eggs and sugar
eggs and sugar
vanilla and sugar in the milk

Now comes the fancy part.  Once the milk is at a gentle boil/simmer.  Pour about 1/3-1/2 of the milk in the bowl with the eggs.  This is called tempering and lets the eggs know that they're about to get cooked.  It keeps them from scrambling later and making lumpy cream.   Mix the milk and eggs with a whisk until the mixture is smooth.

Now, bring the milk in the pan back to a rolling gentle simmer.   Have your pan ready near by, lined with plastic wrap.   Start whisking the milk and pour the eggs mixture into the milk whisking quickly.   Pay careful attention to the corners of the pan.  Stir quickly until you see the cream "burp" a bubble from the middle.  This lets you know that the cream is heated through and can go into the pan.   Don't overmix.  The cream should be thick and glossy.   This whole process will take seconds, not minutes.

cream in the pan just finished!

Now pour/spread the cream into the pan, and tuck the extra wrap around and over the cream to prevent and skin from forming on the cream as it cools.   Look at this tiny little flecks of vanilla in the pastry cream!

ready to refrigerator

Be sure the cream is less than 2 inches thick and is cooling in a layer rather than in a bowl.  It's much safer from a food safely standpoint.   Allow the cream to chill about 2 hours or until cool in the center.

When the cream is cool.   Transfer to a bowl and whisk to loosen and smooth the cream.  Add about 1 T of Grand Marnier or a favorite liqueur adding a beautiful aroma and hint of flavor.   You don't need to add the liqueur if you don't want to.   This is point where you would add vanilla extract if you didn't use a vanilla bean.

Use the pastry cream to fill eclairs, layer between sheets of puff pastry, or use it to fill a pretty cake.

I hope you'll give this a try.  It's delicious and a classic building block of all French pastry.

To print this recipe, click HERE

Pastry Creme (Crème Pâtissière)

500 ml milk

4 yolks from large eggs

125 gm sugar

30 gm cornstarch

30 gm flour

1 vanilla bean

1 T Grand Marnier or to taste (optional)

Directions

1.  Line a shallow baking pan with plastic wrap.

2.  Using a paring knife, slice the vanilla bean lengthwise through one side as if slicing a tube.  Using the back side of the knife, slide it down the length of the exposed bean to scrape out the seeds.  Remove seeds from vanilla bean.

3.  In a saucepan, add the milk, vanilla seeds, the bean pod and 1/2 of the sugar.

4.  Heat to a simmer.

5. While the milk is heating, whisk the egg yolks with the remaining sugar in a large heat proof bowl.  Then add the cornstarch and flour.  Mixing completely.

6.  Remove the vanilla bean pod from the milk.  Pour 1/2 or less of the warm milk into the bowl  over the egg mixture and whisk until smooth.  Increase the heat under the milk to a very slow boil.

6.  Pour the egg mixture back into the pan, whisking quickly and constantly until the mixture forms a smooth, glossy cream and the cream "burps" a bubble in the pan.

7.  Pour cream into the lined pan, folding the wrap and pressing on to the hot cream.  Be careful, it's hot!

8.  Chill until completely cool.

9.  Remove plastic wrap and put the cream in a bowl.  Whisk until smooth, then add Grand Marnier or other liqueur.   This is the time to add vanilla extract if you did not use a vanilla bean.

10.  Your pastry cream is ready for your favorite pastry!  It will keep for about 2 days and must be refrigerated.


raspberries in puff
raspberries in puff
In dessert, favs, other, Susan's List, the little French bakery, The Little French Bakery, the little French bakery Tags creme patisserie, pastry cream, The Little French Bakery
50 Comments

Long and Slow Baked Apples

January 11, 2013 Susan Holding
featured-apples.jpg

What are your plans for the weekend?   In that organizing mood?   I'd love to know how many of those plastic tubs are sold during January.   Today I saw a display of them in very fancy colors.  Personally, I like the clear ones so I can see what's inside.  I guess I could label them and then it wouldn't be necessary to open each one to find my summer clothes.  My new goal is things I'm not using get it out the door rather than squirreled away in the basement.   We'll see! I think it feels good to have some routine back again after the holidays.  Back from the free fall of sweets and dips.  Don't get me wrong, it's still winter and comfort food is still very welcome.   Now it's time for slow roasting, nice smells and healthier options.

There's comfort food, and then there's great comfort food.  What could possibly be better than creamy, sweet baked apples?  This is an Around My French Table recipe, by Dorie Greenspan.   As you know, I love simple, yet a little fussy recipes.   I think you'll love this one.   Why?

1.  You get to use ramekins.  You know you love them.

2.  You get to use your mandolin.  Promise, promise, promise you won't use it without the guard.

3.  You'll practice your apple peeling.

4.  You'll bake with plastic wrap.  Something I did in Paris and thought I'd never do again.  It works, really!

5.  The result is a delicious  apple dessert -so creamy and rich, it's almost like custard.   It's well worth the fussy preparation.

Long and Slow Baked Apples

The recipe is actually pretty simple, just a little time consuming.  Peel, core and slice apples. I used Fuji and they were  a really nice texture and flavor.   Be sure they're sliced very thin.

Then layer the slices with melted butter, and sugar that has been spiced with ginger and orange zest.   I skipped the ginger and used nutmeg instead.  The slices fit perfectly into the ramekins and towered over the top.

stacked apples
stacked apples

Then, wrap the ramekin in plastic wrap, then foil.    Make a few puncture holes in the top and cover with another ramekin to provide just a little pressure to the apples while they bake.

plastic wrap on apples
ramekins on top
ramekins on top

Now, find a good book - or a closet to clean.   The apples will bake for two hours at 300 degrees F.  After they're baked, let them cool all wrapped up for  15 minutes or so, then carefully unwrap them.   It's amazing!

finished apples1
finished apples1

I went a little crazy and made three recipes from Around My French Table.   The herbed spaetzle, the Orange Pork Tenderloin and the Long and Slow Baked Apples.  It was a wonderful meal.  The pork and fragrant fruits were a nice combination.   The apples were a light yet very satisfying dessert ( with some sweetened whipped cream!)

When I make these again, I'm going to turn the apples out on to a plate and serve them with a dollop of creme fraiche.    It's always a perfect match with apples.  Do you know how to make creme fraiche?    It's very easy, but requires a little planning.

To print, click HERE

Creme Fraiche

2 cups Heavy Cream

2 T Buttermilk

Mix together, and allow to set uncovered at room temperature overnight ( or about 8-12 hours).  You can use it right away or stir, cover and chill.  The mixture will continue to thicken and become more tangy.  You can keep it up to about 2 weeks in the refrigerator.   If you don't need so much, feel free to divide the recipe and only make a half batch.

Stayed tuned everyone!  I'm heading to Paris and will try to send you photos and do a few blogs posts.  Is there anything you'd like to see or read about while I'm there?  What a nice coincidence that next week's Around My French Table  recipe in a French Apple Tart.  Tres Bien!

baked apples on tray
In around my french table, favs, french fridays with Dorie, other, Susan's List, the little French bakery, The Little French Bakery, the little French bakery Tags apples, apples dessert, desserts, dorie greenspan, little french bakery
35 Comments

Onion Confit Pizza

January 8, 2013 Susan Holding
featuredpizza.jpg

Happy New Year everyone!   Most of the decorations are put away, and I'm happy to be back blogging and cooking.  As I write, there are carpenters working on the bakery building adding a "pantry".  It's going to be great.  Lots of room to put away the shelving units that have been taking up space for years.   There will be more room for classes, and I'll be able to welcome larger groups. Since we didn't need two pizzas, and it's the middle of the day.   I invited the guys for lunch.  It's freezing cold and a nice hot pizza sounded good.  It makes me feel a little like Ina Garten!

I decided to use Chianti for the wine.  The kind with the straw around the bottle.  When we were Christmas shopping, I found boxes of the drippy candles that change color as they drip. My dad loves these and so do I.  I could use a regular wine bottle, but since I needed wine and the candles needed a bottle, this was the perfect match.  I need to drink or use about another 750 ml's of wine before the candle dripping can commence but I'm off to a good start.  If you look at the box, you'll see the wine bottle sketched out!  I promise to show you the bottle once it's been dripped.

dripping candles


There are some fun recipes just around the corner.  The recipe for today is from Baking with Julia, by Dorie Greenspan and is part of the Tuesdays with Dorie blogging group.  It's not too late to pick up a copy and join the fun.

On to the pizza...

goodchianti by .

A few years ago, I was making the Onion Soup from Thomas Keller's Bouchon.  In the recipe, he teaches how to cut an onion perfectly so it will wilt and cook down nicely for caramelized onions.  I used the same technique here and will show you how it's done.

chopping an onion

chopping onion

Cutting an onion

If you run out of room, turn the onion around and start from the other side.  Cutting this way will break the membrane in the layers of the onion and help to make them move tender and softer as they caramelize.

So what is confit (cone-fee)?  It's the process of cooking to make the fruit of vegetable soft but sweet.  Orange peels are confited before being dipped into dark chocolate.  Confiture is jam in French.  So think... tender, sweet onions.

Once the onions (sprinkled with sugar) are in the pan and cooked a bit, the wine, red wine vinegar, thyme, salt and pepper as added.  I simmered the confit for about 1 1/2 hours.  Just the perfect time for the dough to have a second rise.

The dough is very easy to put together and has a wonderful texture and feel.  If you're not planning to make the onion confit, you should still head over to The Boy Can Bake and Paul will have all the recipes for you.

I used a mix of Parmesan, Romano, and Asiago cheeses with an assortment of olives.  A few of the olives were stuffed with blue cheese so they were a great addition.

ready for oven by

Exactly 15 minutes later the pizza was crisp, golden and delicious.    I baked mine on parchment on a baking sheet and skipped the peel process.

pizza on plate by Susan Holding


Have a great time making this pizza!   (and dripping candles...)


In Baking With Julia, Julia Child, Main, Susan's List, the little French bakery, The Little French Bakery, the little French bakery Tags julia child, onion confit, pizza recipe, The Little French Bakery
8 Comments

Fig Cookies (aka Newtons)

December 22, 2012 Susan Holding
fig-feature.jpg
figs
figs

Happy Holidays everyone! It's only a few days for Christmas, and I'm thinking this may be my last post before the holiday. I'd like to start off by wishing you all the best of the season and many thanks for reading and supporting my blog.

We've shoveled out from Thursday's blizzard and are ready to brave the stores to select presents for friends and family. Nope, we're not late or under pressure. This is the way we do it. In fact, one of our first dates was shopping together one day after work on the 23rd of December. I'm sure our trip will include lunch of sushi!

Figs are high on my list of favorite holiday foods. I think I stumbled upon them about ten years ago in a fancy-schmacy grocery and bought a few. Add some stilton, pears, port and a fire in the fireplace and it's perfect. Speaking of favortie things, I have one question. Why is Favorite Things considered a holiday song? Because of the warm woolen mittens? Geeesh. I love Julie Andrews, but I think it's a stretch. Back to the figs. I picked up three small boxes, brought them home, and then came across a recipe for Fig Cookies with red wine. I'm in!

You can start out with your dough or figs paste first.  They both need to cool/chill so it won't really matter which you start with.   I started with the paste.   Chop the figs and open a bottle of red wine.   Hmmm, what to do with the rest of the bottle after the 1 1/2 cups are in the pan?

chopped figs
chopped figs

Once in the pan, I added a pinch of salt to bring out the sweetness.  You could also add black pepper or some anise seeds depending on your like/dislikes in the spice area.  Simmer the figs until they're soft and the syrup if reduced it about 1/2 cup.  It's hard to tell how much liquid is left, but tip the pan and when the syrup is almost gone, call it.  Let mixture cool in the pan while you prepare the dough.

cooked figs 1
cooked figs 1
cooked figs 2
cooked figs 2
cooked figs 3
cooked figs 3

Now on to the dough.  You can use a stand mixer, or hand mixer.   Cream the butter and sugar and mix until light and fluffy.  Add the salt, vanilla, zest., mix.   Add the egg.  Mix to combine.   Mix in the flour just until the dough comes together.   Flatten the dough in a rectangle and chill for about 30 minutes.

While the dough is chilling, you can puree the fig paste in a food processor or blender.

fig spread
fig spread

Notice how red the spread looks.  I was a little worried at first, but it darkens when it cooks.   This is a good time to preheat your oven.

Using floured parchment paper.  Roll the dough about 12inches long and about 14 inches wide.  If it's easier, you can do this in two parts, so the dough is 12 x 7 or so.   It should be about 1/8" thick.

rolled dough
rolled dough

Now for the tricky part.   Make 3 inch wide strips, and pipe the filling about 1/2 inch down the center.  Resist the temptation to use too much filling.  If the dough feels too sticky or warm, don't hesitate to pop it back in the refrigerator for a few moments.

Fold the strips to the middle, slice into cookies and place seam side down on the parchment-lined baking sheet.   I had a fair amount of scraps that I baked just for fun.

trimmings
trimmings

After 20 minutes at 350 degrees F, the cookies was perfect!  Golden on the bottom and very fragrant.  I knew they were super hot, but I had to try one right of the oven.  It was so, so delicious!

stack of cookies
stack of cookies

To print this recipe, click HERE

Fig Cookies

Fig Filling

1  1/2 cup chopped figs (about 10 ounces)

3/4 cup red wine

1/3 cup sugar

1 tsp lemon zest

1/4 tsp salt

1 4/ tsp black pepper or 1/2 tsp anise seeds (optional)

Dough

1 stick unsalted butter, softened

1/2 cup sugar

1 tsp vanilla extract

1 tsp grated lemon zest

1/2 tsp salt

1 large egg

1  1/2 cups all-purpose flour

flour for dusting/rolling

For the Filling:

In a saucepan, combine all all the filling ingredients.  Bring the mixture to a boil, then reduce to a simmer.   Simmer until most of the liquid has reduced and the figs are tender.  The spread will have about 1/2 cups of liquid with the soft figs.   Allow the mixture to cool in the pan while you assemble the dough.

For the Dough:

With a mixer, mix the butter and sugar until it’s light and fluffy.  Add the salt, zest,  and vanilla and mix.  Add the egg, and mix.  Reduce the speed of the mixer and add the flour.  Mix until just combined.   Remove the dough from the bowl, and make 1 or 2 rectangles.  Wrap with parchment paper and chill for 20-30 minutes or until cool and firm to the touch.  It’s a little easier to work with two smaller pieces of dough.

For the Cookie Assembly:

Preheat your oven to 350 degrees F.  Place a rack in the center position.

Dust a piece of parchment paper (large enough to roll the dough on) with flour.  Place the dough on the parchment, dust, and cover with another sheet.  Roll the dough to approximately 1/8” thick.  You should have a rectangular shape, 12” tall and about 7-12 inches wide depending on the size of your piece of dough.  Carefully cut the dough in 3 inch wide strips. Don’t worry about separately the strips.  Using  a pastry bag or plastic big with a 1/2 “ tip, pipe the fig filling down the center of each strip about 1/2” wide.  Be careful not to overfill the strips.

If the dough is soft, you may want to re-chill for 5 minutes or so.   When you’re ready, carefully fold the side of the strip toward the center.  Slice the strip into cookies, about 1 1/2 inches long, or to your preference.    Place on a parchment-lined baking sheet seam side down.  Bake for 20 minutes, or until the bottoms of the cookies are golden brown.   Repeat if you used two pieces of dough.

Makes 24-36 cookies, depending on size (and rolling/folding skill)

Adapted from Food and Wine Magazine 2012


In cookies, Susan's List, the little French bakery, The Little French Bakery, the little French bakery Tags fig cookies, fig newton recipe, figs, The Little French Bakery
6 Comments

Cream of Cauliflower Soup - Sans Cream

December 14, 2012 Susan Holding
soup-featured-image1.jpg

It's the time of year when it's easy and almost expected to overindulge.  Cookies, candy, hot chocolate, dips... it's everywhere and so hard - at least me-  to resist.   Enter healthy soup!  This is the recipe for those looking for something creamy and fancy with any guilt.  It's easy to make and is very impressive.  I would go so far as to suggest that those who don't like cauliflower will like Cream of Cauliflower Soup.    I like to rate recipes on Gary's "oh yum" scale.  This got two "oh yums".    He's a huge fan of creamy, velvely soups, and this one glistens with goodness.  The recipe is from French Fridays with Dorie, and can be found at food.com, among other sites.  It's not too late to pick the book ... or add it to your list for Santa! As you're preparing for the holiday season, you may be finding your refrigerator a little cramped and in need of some paring down.  If you have a few less than perfect carrots, some wilty celery and a few onions, you're half way there.   Your kitchen will be filled with the wonderful smell of roasting vegetables as you roast the onions, garlic, carrots, leeks and celery.

If yo're in a hurry and just want the soup NOW, pick up a quart of vegetable or chicken stock, chop the cauliflower and add it the the herbs.  In 20-30 minutes, puree and you'll have great soup.   If you're a stock maker like me, you can make your own stock.   It will add about 1-2 hours more, but I think you'll be very pleased with the results.


raw stock vegetables

I roasted mine for about an hour at 400.  There was lots of great caramelization on the vegetables.

The key to the golden color is to roast the vegetables long enough, and to deglaze the pan. Just put the sheet pan over a burner, turn on the hear, and add about a a cup of water or wine. The crispy brown bits (fond) will lift off, and the whole works goes into your stock pot with the veggies and water to simmer.

The stock simmered away for about one hour.  Time to stain the pretty broth from the vegetables.

I used the cotton strainer designed by Michael Ruhlman to separate the solids from the stock.  It you haven't found these already, go to Open Sky and pick up a set.  They would also be a great present for the cook in your life.  They wash easily and are easier to handle than cheesecloth.

Straining the Stock


Once the stock was complete, I sauteed new onion, and leeks, and added wth cauliflower and herbs.  The new soup simmered about 30 minutes.  After a good puree in my beloved Vitamix, the soup was finished.   Rich, golden and warm with an amazing aroma.


Cauliflower Soup

I hope you'll try this over the holiday season.  Serve it is little espresso cups with a dollop of Cream Fraiche, a little cheese or go fancy schmancy with a touch of caviar.


In french fridays with Dorie, soups, the little French bakery, Uncategorized Tags Cauliflower soup, dorie greenspan, michael ruhlmnan, soup recipes, the ltitle french bakery, vegetable stock
5 Comments

Jumbo Marshmallows

December 11, 2012 Susan Holding
jumbo-marshmallows-web1.jpg

Some things in life just make you happy.   Big fluffy marshmallows are perfect treats.  My little friend Maeve turned four recently, and I wanted to send something extra special to her birthday party.  Big puffy marshmallows were perfect.  They are so much better than store bought, and can be cut into just the right size.  I like the big cubes, but you can cut them smaller if you like. You might want add color, flavor or just keep them plain old white.  These are delcious, and paired with a cup of cocoa or turned into a s'more, they can't be beat.   I promise, they're not too hard, and are well worth the effort.

marshmallows1-web
marshmallows1-web

To print this recipe, click HERE

Jumbo Marshmallows

1 cup cold water

3, 1/4 ounce packets unflavored gelatin

2 cups granulated sugar

2/3 cup corn syrup

1/4 tsp. salt

1 cup powdered sugar

Using shortening or cooking spray, grease an 8 inch pan.   Sprinkle with powdered sugar to cover in a generous coating.

Fit a stand mixer with the whisk.  Empty the packets of gelatin into the bowl, and cover with 1/2 cup water.

In a medium/large saucepan, combine the sugar, 1/2 cup water, and corn syrup and salt.   Attach a candy thermometer to the side of the pan and heat the mixture until the thermonmeter reads 240 degrees F.  Don't stir the mixture..

Very carefully, pour the hot sugar mixture over the gelatin with the mixer running at low speed.   Be careful not to pour on the whisk or the sugar will splatter.  Slowly increase the mixer speed  and whip until the marshmallow is cool and the bowl feels cool to the touch.  This will take about 12 minutes, or longer.  A double batch will fill a mixing bowl and take about 25-30 minutes to cool.  Note:  your mixer may get warm or overheat...

Pour and scape the marshmallow into the pan and smooth.  You may want to use a wet spatula if the mixture is hard to spread.  Dust with powdered sugar and allow to set overnight uncovered.   After the marshmallow has set, turn out on to a cutting board and cut into cubes.  A straight down cut works easier than sawing motion.  Dust the marshmallow with powdered sugar to prevent sticking.    Store well wrapped at room temperature  for up to 2 weeks.


three-marshmallows-web
In dessert, favs, Susan's List, the little French bakery, Uncategorized Tags birthday party dessert, hot chocolate and marshmallows, kids dessert, marshmallow, marshmallow recipe
2 Comments

Gingerbread Cakes

December 4, 2012 Susan Holding
closeup-plated1.jpg

What a day!  What a week!  I'm happy to be back baking and blogging.   Holiday decorations are going up, and I'm starting to get in the spirit.  I hate to admit it, but I'd like a little snow instead of the balmy 60 degree days we've been having.   I'm sure I'll regret that thought about February. I'd like to start off by wishing a big Happy Birthday to my husband,  Gary!  The kindest, sweetest person in the world.  It's been a big year for him.  Recently, he packed up our Prius and went off to New York City to help with the recovery efforts from hurricane Sandy.   No special reason, just overcome with the desire to help.    To celebrate his birthday, I've made baby gingerbread cakes.

The recipe coincides with my Baking with Julia blog group.  To bake along, you can find the recipe at Karen's Kitchen Stories.

As I write this, I'm still cracking up from my dumb baking blunder.  More on that later...

The recipe has some great ingredients including black pepper, cocoa, instant espresso, and fresh ginger.  The smells are amazing.   I found a tube of fresh ginger in the produce section of the grocery.  I liked it a lot.  It was very smooth, and made for easy measuring and smooth fresh ginger in the batter.  You can see it in the photo in the white bowl off to the right.


This is where the craziness comes in.  I bought the cutest little paper cups for holiday baking.   They were just a little smaller than 4 inches, but I though they'd be perfect.   I could serve the cakes in the papers or unwrap them just before serving.   The batter was ready, and I gently spooned the batter into the cups.

After a few minutes, I started to wonder where the cups were getting support as the batter expanded.   Guess what?  No where!  The sides were drooping the batter was oozing out onto the baking sheet.   I prepared for round 2 and let the mess finish baking.   Here's what happens when you don't have a study container around a paper baking cup.    I was able to peel a few apart, and salvage at least a few.   I used a 10" cake pan for the next batch, and plan to use it for Gary's birthday dinner tonight.    For anyone who's every felt intimidated to bake with me, this should make you feel much better!


I'm still crazy about the little red cups, and will plan to use them again.  I just can't quite figure out what kind of pan to use do the contents don't spew out.

The whipped cream was sweetened with powdered sugar and garnished with a few pieces of candied ginger.   The reviews so far have been great!  I really like the flavor and texture of this wonderful cake.


In cake, the little French bakery, Uncategorized Tags gingerbread, gingerbread cake recipe, julia child, little french bakery
8 Comments

Spur of the Moment Vegetable Soup (aka Stone Soup)

October 19, 2012 Susan Holding
soup.jpg

As I was making the French Friday's with Dorie, Around My French Table soup, by Dorie Greenspan, I was thinking about a few things I want to share with you.  They're  about chicken stock.  Have we talked about stock before?  Of all the things to make at home, I think this tops the list.  It's inexpensive to make and so much better than you can buy. About three Thanksgivings ago, I was at my sister's house.  We had finished our feast and were dividing the leftovers between the families.  Her mother-in-law asked if we would like some turkey.  I'll never forget the look on her face when I asked,  "Could I have the carcass?"   To me, that was the best part to take home.   I'd add some carrots, celery, onion, garlic, and peppercorns to the carcass with lots of cold water, and start the simmer.   From that big bird, I'd have 7 or 8 quarts of liquid amber stock ready for the freezer.

I usually don't make stock with whole chickens.  It's always a carcass from a chicken I've baked.   True confession... I even make stock from the deli chicken we pick up in a pinch.  The stock is a little saltier, but really good.

In the time it takes you to watch an evening of TV, a few football games, or just putter the day away, you can make chicken stock. Here are the steps, tips and tricks I've learned along the way.

To print this recipe, click HERE

Chicken Stock

In a big stock pot (as big as you have), add 1-2 chicken carcasses or 1 whole chicken.  Wings, necks and backs are great to keep in the freezer for stock day.

Add:

 2-3 carrots, cut into  thirds

2-3 stalks celery, cut into thirds

1-2 medium onion, quartered

1-2 cloves of garlic, smashed

8-10 whole peppercorns

1 bay leaf

1-2 turnips or parsnips if you have them

1 leek, if you have one - cut into pieces and very well washed.  You don't want grit in your stock.

If you have any leftover roasted vegetables from your chicken, add those too.

Any combination of herbs including rosemary, thyme, oregano (I add a spring of fresh thyme and a small spring of rosemary)

Fill the stock pot with cold water, about 2 inches from the top.  Depending of the size of the stock pot, you'll have a few quarts of liquid.

Turn on the heat, and bring the stock to a very long simmer.  You may have some scum float to the top.  Skim that off and discard.

Don't stir the stock, just let it simmer undisturbed.  Be sure not to let it boil to hard, or that will make if cloudy.  You can put a cover over the pot, but keep it ajar.  Check if periodically, adjust the heat to maintain the low simmer.  There should be tiny bubbles around the edges and near the surface, but nothing too forceful.  You can let the stock simmer for several hours.  The longer it simmers, the deeper the flavor and richness of the stock.  You will loose some of the liquid. It may reduce, but you can add more water if desired.

When you're ready to finish the stock, line a colander with cheesecloth or a clean handkerchief that you don't mind getting "stocky".   Using a large bowl or another pot under the colander, gently press a ladle against the surface of the stock removing the broth, and strain through the cheesecloth into the bowl.  Try not to stir. You'll get some chicken bones and vegetable pieces in the colander.  It's okay.

When you have most of the liquid out of the pot in the second bowl or pot, discard the solids.

Here's an important food safety tip:  Get the stock COLD quickly.  Bacteria will double every twenty minutes when the temperature is between 40 and 140 degrees F.   I make an ice bath with cubes and water, and place the bowl with stock the bowl of ice water.  If you have a lot of stock you may have to work in batches.  It may also take more than one batch of ice water.   When the stock feels barely warm to the touch.  Transfer to the storage container, label and place in the refrigerator for three days or into the freezer.  I like to put in the the frig overnight, and skim off any fat that floats to the top, then freeze.

When you're ready to use it, I run the container under warm water, release the stock cube, and put it in the soup pot frozen.  It melts quickly and cuts the time needed to defrost.   For risottos and dishes requiring warm stock, I thaw in the microwave or in the refrigerator overnight.

I use one quart deli containers and freeze about 3 quarts at a time.  I bought a case of containers and reuse them as much as  I can.  Maybe I should put sets of 6 in the shopping area of the website so you can have access to them too.


I want to tell you that Michael Ruhlman, a fantastic writer and chef has invented reusable straining cloths.  They come in three sizes and work really, really well.  If you're planning to be a stock maker, I suggest investing in these guys.

Now on to the soup recipe!

Our refrigerator is still full of vegetables from our CSA.  In addition, one of my cooking school students brought me a bag of the most gorgeous carrots.  They're huge!  I took a picture of them, and then decided you needed a reference to see how big they really are so I added the pencil.  Here they are!  That's a regular pencil next to them.  Aren't they amazing?!?

carrots-1
carrots-1

I took several liberties with the Around My French recipe, adding a few more kinds vegetables, and a few other herbs and spices.  The soup is delicious!  I didn't puree mine, though that would be great too.   The carrots, celery, onion and potatoes are the heart and soul of the recipe.  Any other vegetable you can add are a bonus.  I debated on green pepper and decided to leave it out for fear it would be too strong.

vegetables-2
vegetables-2
stone-soup-4
stone-soup-4

Here's my version:

[print_this]

 Vegetable Soup

1 pound carrots, washed/peeled and cut into small pieces

3 stalks celery, washed and cut into pieces

1 onion, chopped

1 leek, well washed and sliced (white and part of light green parts)

2 cloves of garlic, peeled and chopped

3 small potatoes

2 turnips

1-2 small pak choy, chopped with tender greens

1-2 tsp salt

1 tsp black pepper

1/2 tsp ground ginger

1/4-1/2 tsp crushed red pepper flakes

1 tsp dried, or 2 sprigs fresh thyme

1 -2 sprigs rosemary

2 sage leaves or 1/4 tsp dried sage

2 T butter

1 T olive oil

6 cups (approximately) chicken stock (low fat/low salt if possible)

The ginger adds a subtle note that is hard to describe.  I would consider this a secret ingredient with a certain je ne sais quoi.

Heat the butter and olive oil in the bottom of a large stock/soup pot.  Add the onions, leek, garlic,  and carrots.  Cook over medium heat until the onions begin to look translucent.  Add the herbs, and remaining vegetables.  Increase heat to bring to a boil, then reduce to a simmer.   Simmer soup for 20-30 minutes until the turnips and potatoes are tender.  Adjust seasonings, adding salt and/or pepper as desired.   Thin if necessary with more stock or water.  Remove herb sprigs and serve!   If you would like to serve a smoother soup, you could use an immersion blender or blender to puree to desired consistency.  Serves 6

[/print_this]

Vegetable Soup
Vegetable Soup
In soup, soups, the little French bakery, The Little French Bakery Tags chicken stock recipe, soup recipe, Vegebable soup
6 Comments
← Newer Posts Older Posts →
Hi, I'm Susan.. Welcome! I did my pastry training at Le Cordon Bleu, Paris where I earned the Diplome de Patisserie.Thanks for stopping by. Enjoy the stories and recipes and please keep in touch!  Curious about my background?  Here’s the SCOOP!


Hi, I'm Susan.. Welcome! I did my pastry training at Le Cordon Bleu, Paris where I earned the Diplome de Patisserie.Thanks for stopping by. Enjoy the stories and recipes and please keep in touch! Curious about my background? Here’s the SCOOP!

Heading to Paris? Check out my tips and favorite spots to shop, eat and sight see.

Heading to Paris? Check out my tips and favorite spots to shop, eat and sight see.

The perfect gift for the cook/baker in your life!

The perfect gift for the cook/baker in your life!

PURCHASE your own copy! You can purchase HERE

© The Little French Bakery, 2011- 2023                      

Press Kit                  Privacy Policy         Site Map